
I’ll never forget the first time I made chocolate frosting from scratch. It was for my daughter’s seventh birthday. She had requested a chocolate cake with chocolate frosting. Store-bought frosting just wouldn’t cut it. I wanted to create something special. Something that would make her eyes light up. That afternoon in my kitchen changed everything. The rich, velvety frosting that came together in my mixing bowl exceeded all expectations. The birthday girl declared it the best frosting she’d ever tasted. From that moment on, this recipe became my go-to for every celebration.
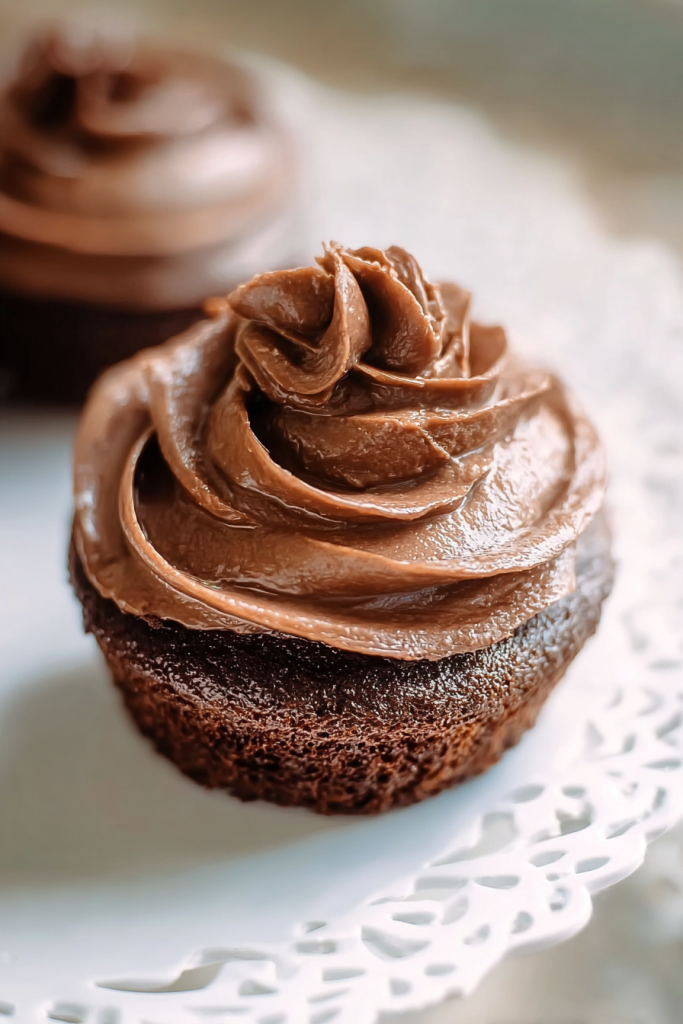
Chocolate frosting holds a special place in baking. It transforms ordinary cakes into showstoppers. It adds depth and richness to simple cupcakes. Whether you’re celebrating a milestone birthday or just treating yourself on a Tuesday, this frosting delivers. What I love most about this recipe is its simplicity. You don’t need fancy ingredients or professional equipment. Just a few pantry staples and an electric mixer. In less than fifteen minutes, you’ll have silky, decadent frosting ready to spread.
Over the years, I’ve made this frosting countless times. For birthday parties, holidays, and random weekend baking adventures. Each time, it turns out perfectly. The texture is smooth and spreadable. The flavor is intensely chocolatey without being overwhelming. And the best part? It pipes beautifully if you’re feeling fancy. This recipe has become such a staple that my family requests it specifically. They can tell the difference between my homemade version and anything store-bought.

Why This Recipe Works
This chocolate frosting recipe succeeds because of its perfectly balanced formula. The generous amount of butter creates that creamy, luxurious texture we all crave. Butter provides richness that shortening simply can’t match. It melts on your tongue, carrying the chocolate flavor throughout. When softened properly, butter whips into an airy consistency. This makes the frosting light despite its decadent taste.
The cocoa powder delivers deep chocolate flavor. Sifting it removes lumps and ensures smooth integration. High-quality cocoa makes a noticeable difference here. Dutch-processed cocoa offers a mellower taste. Natural cocoa provides a more intense chocolate punch. Either works wonderfully in this recipe. The key is sifting it thoroughly. Those few extra seconds prevent grainy texture later.
Powdered sugar serves multiple purposes in this frosting. It sweetens, obviously, but it also stabilizes. The cornstarch in powdered sugar helps the frosting hold its shape. This means your decorated cupcakes won’t wilt. Your piped rosettes will stay pristine. Sifting the powdered sugar is just as crucial. Lumps of powdered sugar create an unpleasant grainy texture. Nobody wants that in their frosting.
Vanilla extract might seem like a small addition. But it enhances the chocolate flavor remarkably. It adds warmth and complexity. The milk provides the perfect consistency adjuster. Too thick? Add another tablespoon. Too thin? Hold back on the last tablespoon. This flexibility means you can customize the frosting. Thick frosting works best for piping detailed decorations. Thinner frosting spreads more easily on layer cakes.
Why You’ll Love This Chocolate Frosting
You’ll love this frosting for its versatility. It works on virtually any dessert. Chocolate cake becomes a double chocolate dream. Vanilla cupcakes gain sophisticated contrast. Even yellow cake transforms into something special. I’ve spread it between cookies. I’ve used it to fill cream puffs. I’ve even eaten it straight from the bowl. Don’t judge me.
The preparation time is incredibly short. From start to finish, you’ll spend maybe ten minutes. Most of that time is just mixing. There’s no cooking involved. No tempering chocolate. No complicated techniques. Just straightforward beating and mixing. This makes it perfect for last-minute baking projects. Forgot about the school bake sale? This frosting saves the day.
The flavor profile appeals to everyone. Kids love the sweet chocolate taste. Adults appreciate the rich, not-too-sweet balance. Chocolate lovers get their fix. Even people who usually prefer vanilla admit this frosting converts them. The texture is what really wins people over. It’s creamy and smooth. It spreads like a dream. It pipes into beautiful swirls. And it tastes like you spent hours in the kitchen.
Ingredients, Instructions & Recipe Details
Ingredients for Chocolate Frosting
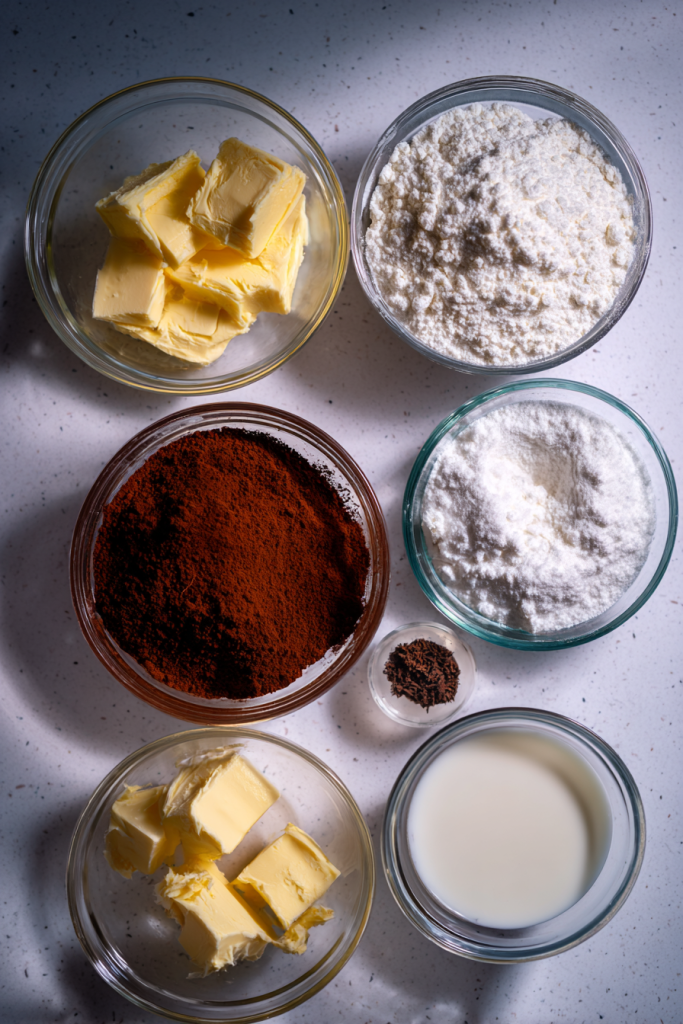
Before we dive into the instructions, let me walk you through each ingredient. Understanding what each component does helps you troubleshoot. It also helps you make smart substitutions when needed. I’ve experimented with this recipe more times than I can count. These insights come from real kitchen experience.
| Ingredient | Quantity | Notes |
| Butter | 1 cup | Softened, salted or unsalted works |
| Cocoa powder | 1/2 cup | Sifted before measuring |
| Powdered sugar | 5 cups | Sifted to remove lumps |
| Vanilla extract | 1 teaspoon | Pure vanilla recommended |
| Milk | 3-4 tablespoons | Adjust for desired consistency |
Recipe Timing
Prep Time: 10 minutes | Cook Time: 0 minutes | Total Time: 10 minutes
Servings: Frosts one 9-inch two-layer cake or 24 cupcakes | Difficulty: Easy
Step-by-Step Instructions
Step 1: Creaming the Butter and Cocoa
Begin by placing your softened butter in a large mixing bowl. Add the sifted cocoa powder directly to the butter. Using an electric mixer, beat these together on low speed initially. This prevents a cocoa powder explosion in your kitchen. Trust me, I learned this lesson the hard way. Once the cocoa starts incorporating, increase to medium speed. Beat for about two minutes until the mixture becomes silky smooth. The butter and cocoa should blend completely. No streaks of butter should remain. The mixture will look dark and glossy. This foundation determines your frosting’s final texture.
Step 2: Adding Vanilla Extract and Sugar
Pour in the vanilla extract next. Mix briefly to distribute the vanilla throughout. The aroma at this point smells incredible. Now comes the powdered sugar. Add it gradually, one cup at a time. Beat on low speed after each addition. This gradual approach prevents sugar clouds. It also ensures thorough mixing. After adding all five cups, your mixture will be quite thick. It might seem too stiff. Don’t worry. We’ll adjust the consistency next. The frosting should look dense and hold its shape when you lift the beaters.
Step 3: Adjusting Consistency with Milk
With the mixer running on low, slowly drizzle in three tablespoons of milk. Watch the consistency carefully as you add the milk. The frosting will transform from stiff to spreadable. If you plan to pipe the frosting, stop at three tablespoons. For spreading on cakes, you might want four tablespoons. Add that final tablespoon if needed. Mix thoroughly after each addition. The milk brings the frosting to life. It creates that perfect spreadable texture. Remember, you can always add more milk. You can’t take it away. Start conservative and adjust as needed.
Step 4: Whipping to Fluffy Perfection
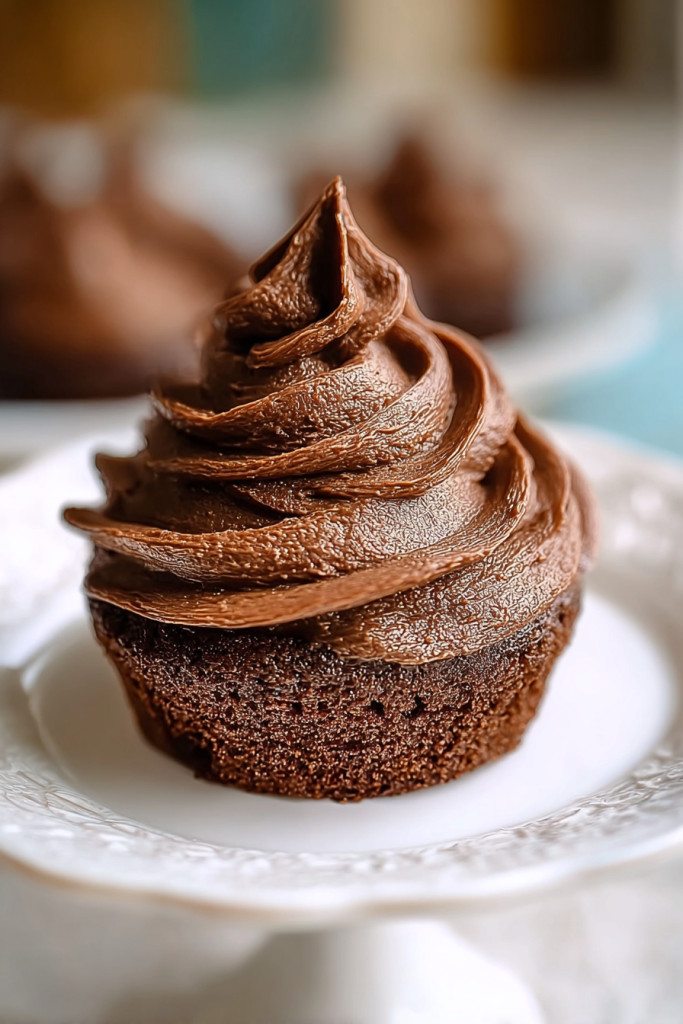
Scrape down the sides and bottom of your bowl. Bits of unmixed butter or sugar might be hiding there. Now increase the mixer speed to medium-high. Beat for two to three minutes. This final whipping incorporates air into the frosting. Air makes the frosting light and fluffy. You’ll see the color lighten slightly. The texture becomes almost mousse-like. The frosting should have a glossy sheen. When you lift the beaters, it should form soft peaks. These peaks should hold their shape but have a slight curl. This indicates perfect consistency. Your frosting is now ready to use.
Serving Suggestions
This chocolate frosting shines on so many desserts. Spread it generously over a classic chocolate layer cake. The chocolate-on-chocolate combination creates pure decadence. Vanilla cupcakes benefit from the contrast. The frosting’s richness balances vanilla’s lightness. Yellow cake becomes instantly more sophisticated. Red velvet cake gets its traditional cream cheese frosting swapped for this chocolate version. The result surprises and delights.
Pipe rosettes onto cupcakes for elegant presentation. Use a large star tip for dramatic effect. Swirl the frosting onto cookies for sandwich cookies. Graham crackers become gourmet with this frosting between them. Spread it between cake layers for extra moisture. Top brownies while they’re still warm. The frosting creates a fudgy glaze effect.
Garnish your frosted creations with chocolate shavings. Use a vegetable peeler on a chocolate bar. Colorful sprinkles add whimsy for children’s parties. Crushed cookies provide texture and visual interest. Fresh berries offer a tart contrast. Edible flowers create sophisticated presentation. Sea salt flakes enhance the chocolate flavor. Mini chocolate chips add extra chocolate intensity. Each garnish transforms the dessert’s appearance and taste.
Pro Tips for Success
Temperature matters tremendously with this frosting. Your butter must be truly softened. Set it out thirty minutes before starting. Press it with your finger. It should dent easily but not be greasy. Too-cold butter won’t cream properly. Too-warm butter makes runny frosting. Room temperature is the sweet spot. Around seventy degrees Fahrenheit is ideal.
Sifting isn’t optional despite what you might think. Both cocoa powder and powdered sugar develop lumps. These lumps won’t disappear during mixing. They create gritty texture in the finished frosting. Take two minutes to sift. Your frosting will be immeasurably smoother. Use a fine-mesh sieve if you don’t have a sifter. The results are identical.
Quality ingredients make a noticeable difference. Good cocoa powder provides richer flavor. Ghirardelli and Valrhona are my preferred brands. Real vanilla extract beats imitation every time. The flavor difference is obvious. Cheap powdered sugar sometimes contains more cornstarch. This can affect consistency. Stick with name brands for best results. These ingredients aren’t expensive. The small investment pays off in taste.
Variations, Storage, Pairing Ideas & FAQs
Delicious Variations
Dark Chocolate Frosting
Substitute dark cocoa powder for regular cocoa. Dutch-processed dark cocoa creates intense chocolate flavor. The color becomes almost black. The taste is sophisticated and less sweet. This variation appeals to serious chocolate lovers. Adults particularly appreciate the depth. Use it on Devil’s food cake. The combination is legendary.
Mint Chocolate Frosting
Add one-quarter teaspoon of peppermint extract. Stir it in with the vanilla extract. Start with less extract rather than more. Peppermint is potent and can overpower. You can always add more to taste. This variation is perfect for holidays. Christmas cupcakes taste festive with mint chocolate frosting. St. Patrick’s Day desserts gain appropriate flavor. The mint provides refreshing contrast to rich chocolate.
Mocha Frosting
Replace the milk with strongly brewed coffee. Use the same amount, three to four tablespoons. The coffee enhances the chocolate flavor remarkably. It doesn’t make the frosting taste like coffee. Instead, it deepens the chocolate notes. This works beautifully on chocolate cake. Coffee and chocolate are natural partners. The combination creates sophisticated flavor.
Nutella Chocolate Frosting
Mix in half a cup of Nutella. Add it after the vanilla extract. Beat thoroughly to incorporate completely. The hazelnut flavor transforms the frosting. It becomes even richer and more decadent. Kids go crazy for this variation. Adults love it too. The chocolate-hazelnut combination is universally adored. Use it on vanilla cupcakes for maximum impact.
Storage Tips
Store leftover frosting in an airtight container. Refrigeration keeps it fresh for up to one week. Press plastic wrap directly onto the frosting’s surface. This prevents a skin from forming. When ready to use again, bring it to room temperature. This takes about thirty minutes on the counter. Then rewhip briefly with your mixer. The frosting regains its fluffy texture. It looks and tastes freshly made.
Freezing works well for longer storage. Place frosting in a freezer-safe container. It keeps for up to three months frozen. Thaw overnight in the refrigerator. Then bring to room temperature before rewhipping. The texture recovers perfectly. You’d never know it was frozen. This makes advance preparation easy. Make frosting weeks ahead for big events.
Frosted cakes and cupcakes also store well. Keep them covered at room temperature for two days. After that, refrigerate them. The frosting stays stable at room temperature. It won’t melt or separate. Refrigeration extends freshness to five days. Bring refrigerated desserts to room temperature before serving. Cold frosting isn’t as enjoyable. Room temperature reveals the full flavor and texture.
Perfect Pairing Ideas
This chocolate frosting pairs beautifully with numerous cake flavors. Classic chocolate cake creates ultimate chocolate indulgence. Devil’s food cake benefits from the frosting’s sweetness. Vanilla bean cake provides pleasing contrast. The chocolate pops against vanilla’s simplicity. Yellow butter cake becomes instantly more special. Red velvet traditionally uses cream cheese frosting. But chocolate frosting offers delicious alternative.
Try it with unexpected pairings too. Banana cake and chocolate frosting taste amazing together. The flavors complement each other perfectly. Peanut butter cake gets even better. Chocolate and peanut butter are iconic partners. Coconut cake surprises with chocolate frosting. The tropical notes contrast beautifully. Spice cake becomes richer with chocolate frosting. The warm spices enhance chocolate’s depth.
Fill sandwich cookies with this frosting. Chocolate cookies create double chocolate treats. Vanilla wafers benefit from chocolate filling. Graham crackers transform into sophisticated desserts. Spread it on brownies for extra decadence. Use it as a dip for fresh strawberries. The chocolate-strawberry combination never disappoints. Pretzels dipped in chocolate frosting satisfy sweet and salty cravings.
Add raspberry jam between cake layers before frosting. The tartness cuts through chocolate’s richness. Orange marmalade creates similar effect. The citrus brightens the chocolate. Salted caramel sauce drizzled over frosted cake tastes incredible. The salt enhances chocolate beautifully. Crushed peppermint candies sprinkled on top add festive touch. Fresh berries provide tartness and visual appeal.
Frequently Asked Questions
Can I use margarine instead of butter?
I don’t recommend margarine for this recipe. Butter provides flavor and texture that margarine can’t replicate. Margarine contains more water than butter. This makes frosting that’s less stable. It can also taste artificial. If you absolutely must use margarine, choose stick margarine. Tub margarine contains too much water. The frosting won’t set properly. But really, butter is worth the investment. The difference in taste is significant.
Why is my frosting grainy?
Grainy frosting usually indicates insufficient sifting. Lumps in the powdered sugar or cocoa create graininess. These lumps won’t dissolve during mixing. Always sift both ingredients before measuring. If your frosting is already grainy, try this fix. Continue beating on high speed for several minutes. Sometimes extended mixing breaks down small lumps. If that doesn’t work, strain the frosting. Press it through a fine-mesh sieve. This removes remaining lumps. Rewhip after straining.
Can I make this frosting dairy-free?
Yes, dairy-free chocolate frosting is possible. Replace butter with vegan butter or coconut oil. Vegan butter works best for traditional frosting texture. Use full-fat coconut oil for richness. Replace milk with non-dairy alternative. Almond milk, oat milk, or coconut milk all work. The flavor will change slightly. Coconut oil adds subtle coconut taste. Most people enjoy this addition. Follow the same instructions otherwise. The technique remains identical.
How do I make the frosting chocolate darker?
Add more cocoa powder for darker color. Start with two additional tablespoons. Mix thoroughly and assess the color. Add more if needed. Keep in mind this affects flavor too. More cocoa means more chocolate intensity. It also means slightly less sweet frosting. Some people prefer this. If the frosting becomes too thick, add extra milk. One tablespoon at a time until desired consistency returns. Dark cocoa powder also creates darker frosting.
Can I halve or double this recipe?
Absolutely, this recipe scales perfectly. Halve all ingredients for smaller batches. This frosts twelve cupcakes or one single-layer cake. Double everything for large events. Double batch frosts forty-eight cupcakes. Make sure your mixing bowl is large enough. You need room for ingredients to move freely. The mixing time stays the same regardless. Beat until light and fluffy. That’s always your indicator of doneness.
This chocolate frosting has earned its place as my kitchen staple. It’s reliable, delicious, and endlessly versatile. From birthday celebrations to casual weekend baking, it never disappoints. The simple ingredients create something truly special. I hope this recipe brings as much joy to your kitchen as it has to mine.

Best Chocolate Frosting Recipe
Ingredients
- 1 cup butter softened, salted or unsalted
- 1/2 cup cocoa powder sifted before measuring
- 5 cups powdered sugar sifted to remove lumps
- 1 teaspoon vanilla extract pure vanilla recommended
- 3-4 tablespoons milk adjust for desired consistency
Instructions
- Cream the Butter and Cocoa:
- Place softened butter in a large mixing bowl. Add sifted cocoa powder. Beat together on low speed initially to prevent cocoa powder explosion. Once incorporated, increase to medium speed. Beat for about 2 minutes until mixture becomes silky smooth and completely blended with no streaks of butter remaining.
- Add Vanilla and Sugar:
- Pour in vanilla extract and mix briefly to distribute. Add powdered sugar gradually, one cup at a time, beating on low speed after each addition. After adding all 5 cups, mixture will be quite thick and dense.
- Adjust Consistency:
- With mixer running on low, slowly drizzle in 3 tablespoons of milk. Watch consistency carefully. For piping, stop at 3 tablespoons. For spreading on cakes, add the 4th tablespoon if needed. Mix thoroughly after each addition.
- Whip to Perfection:
- Scrape down sides and bottom of bowl. Increase mixer speed to medium-high. Beat for 2-3 minutes to incorporate air. Frosting should become light, fluffy, and glossy with soft peaks that hold their shape. Your frosting is ready to use.
Notes
Sifting is Essential: Always sift both cocoa powder and powdered sugar to prevent grainy texture. Use a fine-mesh sieve if you don’t have a sifter.
Storage: Store in airtight container in refrigerator for up to 1 week. Bring to room temperature and rewhip before using. Can freeze for up to 3 months.
Variations: Dark Chocolate: Use dark cocoa powder for intense flavor
Mint Chocolate: Add 1/4 teaspoon peppermint extract
Mocha: Replace milk with strongly brewed coffee
Nutella: Mix in 1/2 cup Nutella after vanilla extract Consistency Adjustment: Start with less milk and add more as needed. You can always add more liquid but cannot remove it.