There is something about a big bowl of banana pudding that just hits different.
It takes me straight back to summer potlucks, loud family reunions, and lazy Sunday dinners where nobody wanted to leave the table. The traditional version is already great. But add cream cheese? Everything changes.
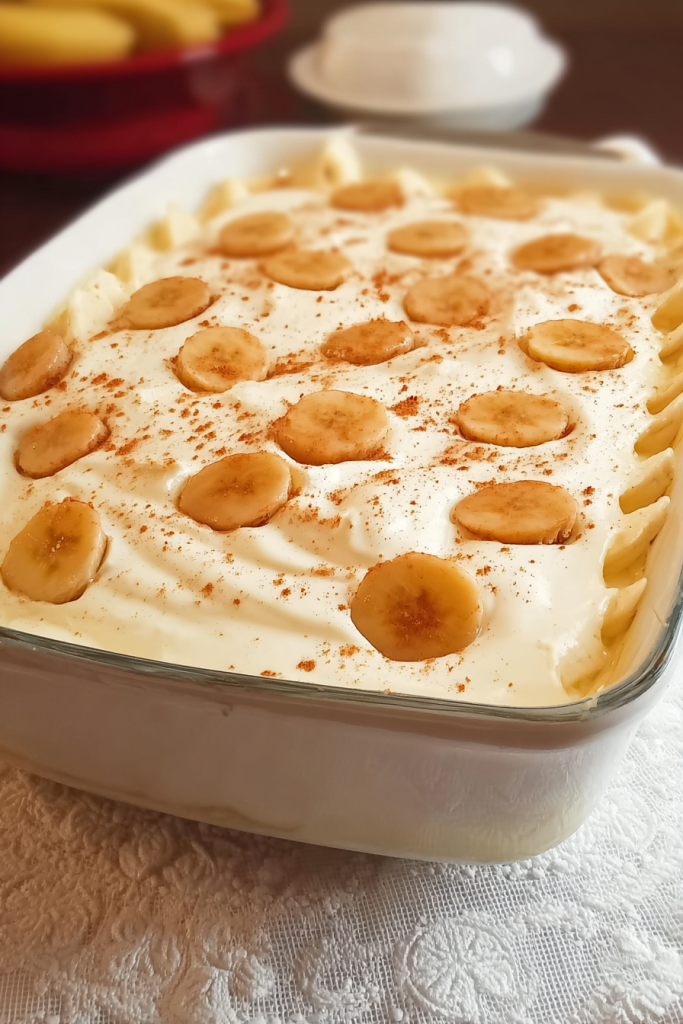
It goes from simple dessert to something rich, velvety, and honestly a little unforgettable. It holds its shape beautifully in a glass dish. It looks stunning. And it tastes like something your grandma would have made if she had a culinary degree.
What I love most is how the tanginess of the cream cheese plays against the sweetness of the bananas. It creates this thick, custard-like texture without ever turning on the stove. No baking. No stovetop. Just layering and chilling.
Perfect for hot days when heating the kitchen sounds like a terrible idea.
Whether you have never made pudding from scratch or you have been doing this for years, this recipe is approachable. I am going to walk you through every single step. Let’s get into it.
Preparation Details
- Prep Time: 10 minutes
- Cook Time: 15 minutes (Mixing and Assembly)
- Total Time: 25 minutes
- Servings: 12
- Difficulty: Easy
The Essential Ingredients
Before anything else, let’s talk about what goes into this.
The most important rule? Cold milk. Not cool. Not room temp. Cold. This is non-negotiable when you are working with instant pudding. Cold milk is what causes the mix to thicken fast and hold those beautiful layers together.
| Ingredient | Quantity | Notes |
|---|---|---|
| Cold Milk | 4 cups | Whole milk gives the best richness |
| Instant Banana Pudding Mix | 2 (3.5 oz) packages | Vanilla pudding works as a great substitute |
| Cream Cheese | 8 oz (1 package) | Must be softened to room temperature |
| Granulated Sugar | 1/3 cup | Adjust slightly based on banana ripeness |
| Whipped Topping (Cool Whip) | 1.5 cups (4 oz) | Thaw completely before using |
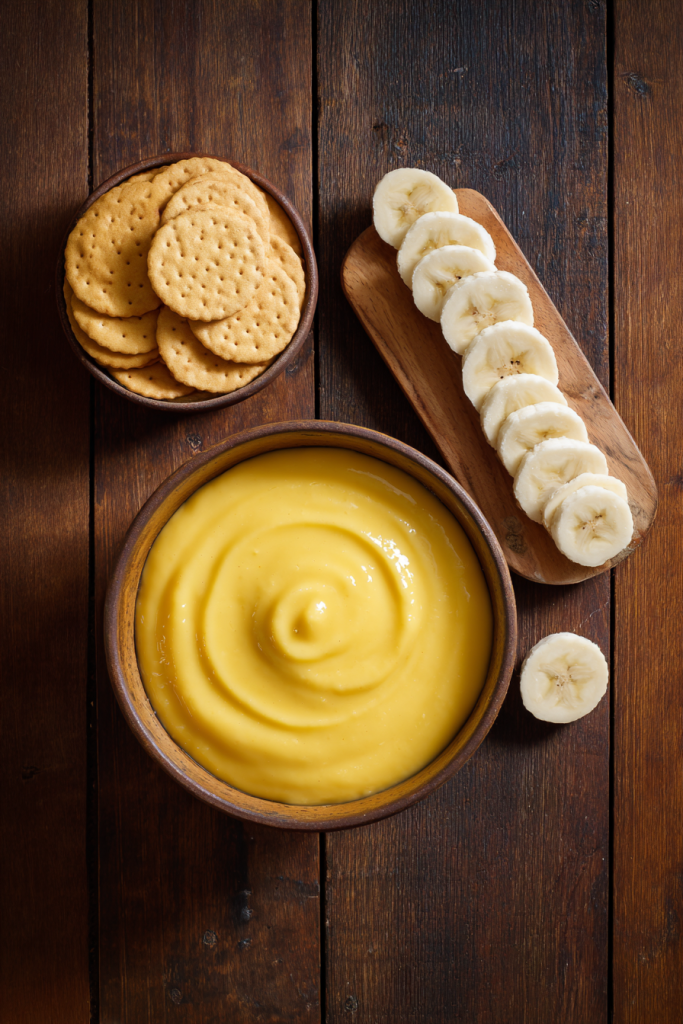
| Vanilla Wafers | 12 oz box | Keep some extra for a crushed garnish |
| Fresh Bananas | 4 medium | Use firm, yellow bananas with few spots |
One quick note on the bananas. You want them firm and yellow with maybe just a freckle or two. Overripe, mushy bananas will basically dissolve into the pudding and make everything overly sweet. Green bananas go the other direction. Not enough flavor, wrong texture. Firm yellow is the sweet spot.
Step-by-Step Instructions: Crafting the Perfect Layers
Phase 1: Creating the Creamy Base
This is where people either nail it or run into trouble. And the difference almost always comes down to one thing.
The cream cheese has to be soft.
I take mine out of the fridge a full hour before I start. If it is too cold, you will end up with little white lumps scattered through your pudding. Nobody wants that. If you are in a hurry, pop it in the microwave for 15 seconds. Just enough to soften it without melting it.
Once your cream cheese is ready, here is how to build the base:
- Grab a large mixing bowl and pour in all 4 cups of cold milk
- Whisk in both packages of the instant pudding mix
- Keep whisking for about two minutes until the mixture starts to thicken
- Set that bowl aside and let it firm up a little more
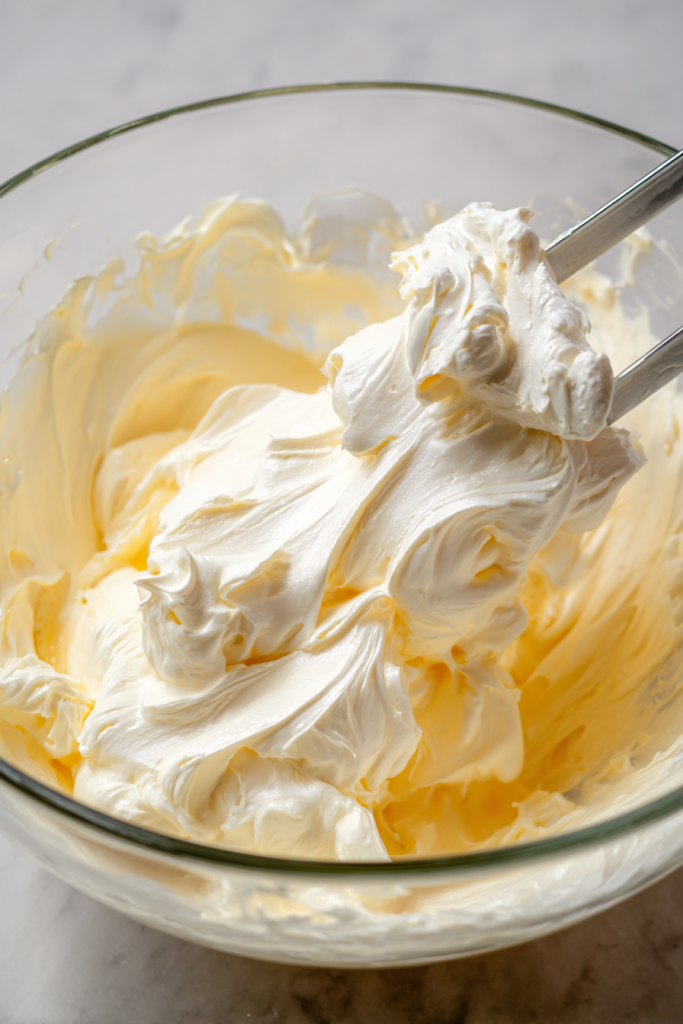
Now in a separate, smaller bowl, combine the softened cream cheese and the sugar. Use a hand mixer on medium speed. You are going for a consistency that looks like smooth frosting. Creamy, fluffy, zero lumps.
Once that looks perfect, slowly fold the cream cheese mixture into your large bowl of pudding. I use the hand mixer again here. It makes sure everything is fully blended and you get that silky, emulsified texture that sets this recipe apart.
Phase 2: Folding and Flavoring
Here is the step that makes this dessert light instead of heavy.
Take your fully thawed whipped topping and add it to the pudding base. Do not stir it. Do not mix vigorously. Instead, use a spatula and fold it in gently. A slow, figure-eight motion. You are trying to keep those tiny air bubbles alive.
Those bubbles are what give the final pudding its airy, cloud-like texture. Stir too hard and you lose them. Lose them and the pudding gets dense. Dense pudding is fine. But light pudding is better.
Once it is folded in, give it a quick taste. You should get a strong banana flavor up front, mellowed out by that creamy, cheesecake-like base underneath. If you swapped in vanilla pudding, it will taste a bit more like a classic custard. Both are delicious. Just different.
Phase 3: The Art of the Layer
This is my favorite part. It is where the dessert starts to look as good as it tastes.
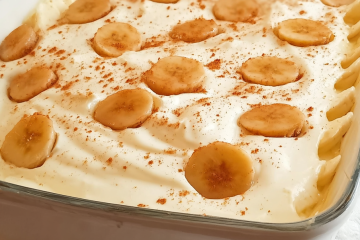
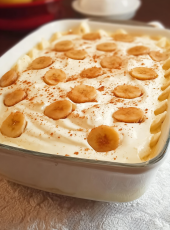
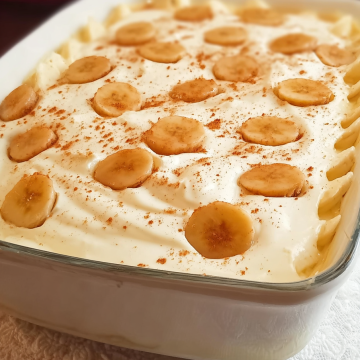
Grab a 13×9-inch glass baking dish. The glass matters here. It lets everyone see those gorgeous layers before you even cut into it.
Here is how to build it:
- Layer 1: Line the bottom of the dish with a solid row of vanilla wafers. These act like a crust and soak up the pudding as it chills.
- Layer 2: Place a single layer of sliced bananas directly over the cookies. Try to cover as much surface as possible.
- Layer 3: Pour exactly half of your pudding mixture over the bananas. Spread it smooth with a spatula.
- Repeat: Do the whole thing again. Cookies, then bananas, then the rest of the pudding.
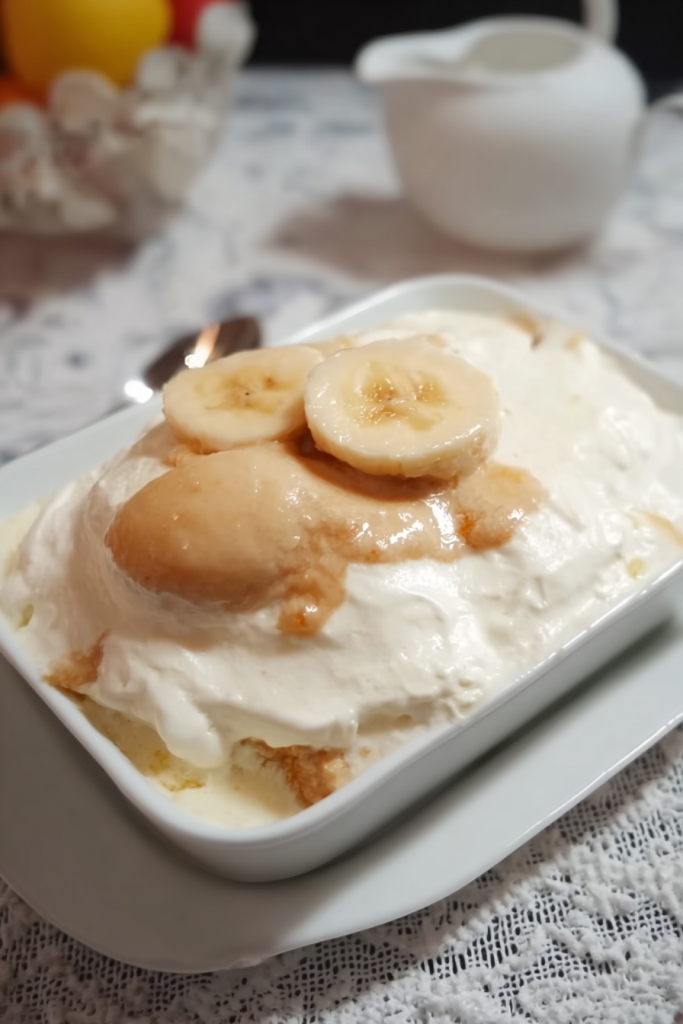
For the top, I like to crush a handful of extra wafers and scatter them over the surface. It adds texture and looks rustic in the best way. You can also stand a few whole wafers upright around the edges of the dish. It makes the whole thing look like it came from a bakery.
Then cover it and refrigerate for at least 2 hours before serving.
Chef’s Tips for Success
A few things I have learned from making this more times than I can count:
On the bananas browning: Work quickly when laying the banana slices. The pudding acts as a seal once it covers the fruit, blocking air from reaching it. Make sure every banana slice is fully covered by pudding. Any exposed slice will brown.
On the cookies: If you love a soft, cake-like texture, let the dish sit in the fridge for the full two hours or even overnight. The wafers absorb moisture and turn almost custardy. If you prefer a little crunch, serve it right at the two-hour mark.
On the milk: Whole milk is the way to go. Lower-fat milks can sometimes make the pudding “weep,” meaning it releases liquid and doesn’t set firmly. It still tastes fine. It just looks a little sad.
On the pudding mix: Double-check the box before you buy it. It must say “Instant.” Cook-and-serve pudding is a completely different product and requires a totally different process. Using the wrong one will give you a soupy mess.
Frequently Asked Questions
Can I make this a day in advance?
Yes, and honestly it tastes even better the next day. The flavors have time to meld together and the layers settle beautifully. Just try not to go past 24 hours. After that, the bananas start releasing moisture which can make the bottom layer slightly runny.
How do I prevent lumps in my cream cheese?
Temperature is everything. Let it sit out for at least an hour before using it. If you are short on time, microwave it for 15 seconds. It should feel very soft and pliable before you ever add the sugar.
Can I use homemade whipped cream instead of Cool Whip?
You can, but the dessert will be less stable. Whipped topping contains stabilizers that help the pudding hold its shape for hours in the fridge. Real whipped cream breaks down faster. If you go that route, plan to serve it immediately after chilling.
What if I cannot find banana pudding mix?
Vanilla pudding works perfectly as a substitute. The banana flavor will be a bit more subtle, but the creamy, cheesecake-like base still shines through. Some people actually prefer it that way.
This cream cheese banana pudding is one of those recipes that never fails.
It looks impressive. It tastes indulgent. And it takes less than 30 minutes of actual work. The next time you need a dessert that people will actually talk about, this is the one. I can almost guarantee someone will ask for the recipe before the dish is even half empty.
Make it once and it becomes a permanent part of your rotation. That is just how it goes.
Cream Cheese Banana Pudding
Ingredients
- 4 cups Cold Milk Whole milk gives the best richness
- 2 3.5 oz packages Instant Banana Pudding Mix Vanilla pudding works as a great substitute
- 8 oz Cream Cheese 1 package, softened to room temperature
- 1/3 cup Granulated Sugar Adjust slightly based on banana ripeness
- 1.5 cups Whipped Topping (Cool Whip) Thaw completely before using
- 12 oz Vanilla Wafers Keep some extra for a crushed garnish
- 4 medium Fresh Bananas Firm, yellow bananas with few spots
Instructions
- In a large mixing bowl, whisk together the cold milk and both packages of instant pudding mix for about two minutes until thickened. Set aside.
- In a separate smaller bowl, use a hand mixer to beat the softened cream cheese and sugar together until smooth and fluffy like frosting.
- Slowly fold the cream cheese mixture into the pudding mixture using a hand mixer to ensure a silky, emulsified texture.
- Gently fold in the fully thawed whipped topping using a spatula and a slow figure-eight motion to keep the air bubbles intact.
- In a 13×9-inch glass dish, create Layer 1 with a solid row of vanilla wafers, followed by Layer 2 of sliced bananas.
- Pour half of the pudding mixture over the bananas and spread smooth. Repeat the layers: cookies, bananas, and remaining pudding.
- Garnish with crushed wafers and refrigerate for at least 2 hours before serving.