

The only recipe you’ll ever need soft, rich, and loaded with chocolate
Let me be straight with you.
I have made a lot of banana bread. Some loaves came out decent. Others were complete failures — dry, bland, or weirdly gummy in the middle.
But this one? This chocolate chip banana bread is different.
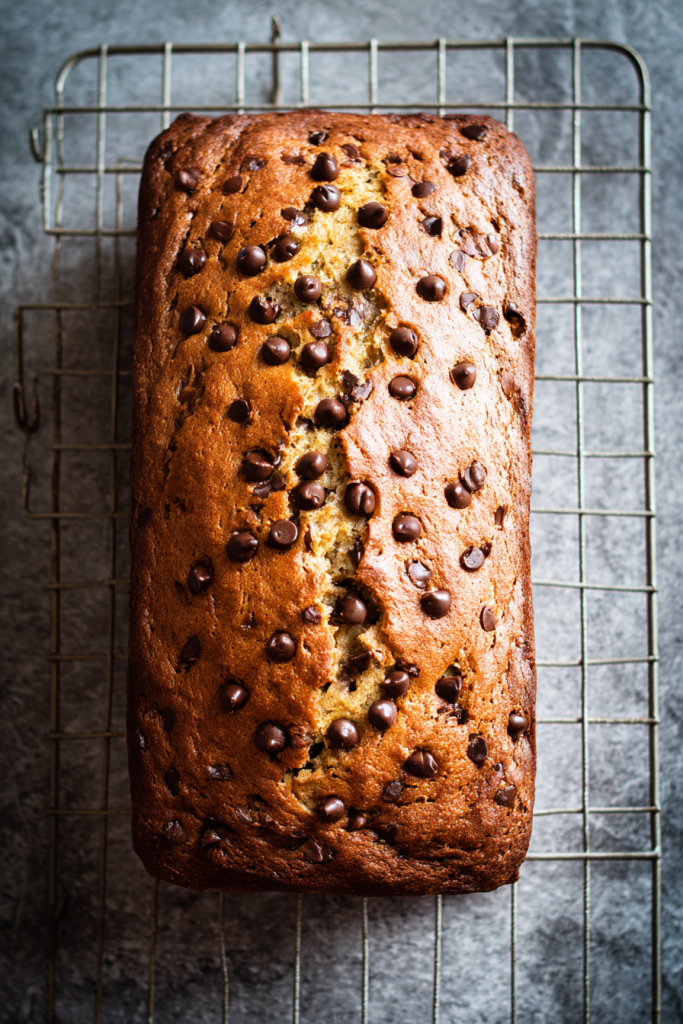
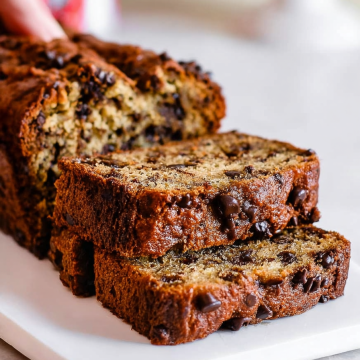
The first time I pulled it from the oven, my whole kitchen smelled like an actual bakery. Golden-brown crust. Chocolate chips peeking out from the top. I waited — not very patiently — for it to cool. Then I sliced in.
One bite and I got it. I understood immediately why people lose their minds over this recipe.
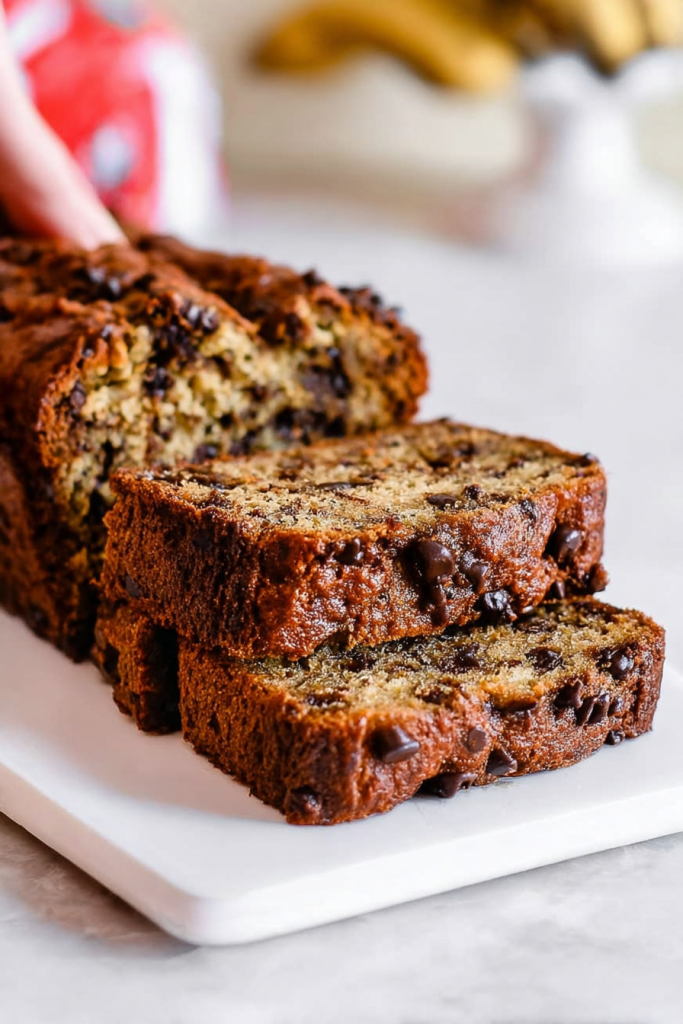
It’s tender. It’s deeply flavorful. And it’s so soft it practically dissolves on your tongue. Those mini chocolate chips scattered through every slice add little pockets of richness that make the whole thing feel indulgent without being heavy. Plus, thanks to melted butter and Greek yogurt working together, this loaf stays moist for days.
If it lasts that long.
Whether you’ve got a bunch of spotted bananas sitting on your counter going to waste, or you’re baking for a group of people who deserve something really good — this recipe delivers. Every single time.
Let me walk you through the whole thing.

Why This Banana Bread Works So Well
I know what some of you are thinking.
It’s banana bread. How complicated can it be?
Fair point. But there’s a reason some loaves come out incredible and others don’t. It comes down to a few smart ingredient choices that work together in a very specific way.
First: melted butter.
Most recipes tell you to use softened or room-temperature butter. This one uses fully melted butter instead. Melted butter coats the flour proteins differently. It absorbs right into the batter and creates that smooth, velvety crumb that separates a great banana bread from a forgettable one.
Second: Greek yogurt.
This is the ingredient that truly sets things apart. Full-fat Greek yogurt is thick, creamy, and just slightly tangy. That tang does something important — it balances the sweetness of the bananas, the sugar, and the chocolate so nothing tastes one-dimensional.
But here’s the part most people don’t know: Greek yogurt has less water than regular yogurt. That means it adds serious moisture without thinning the batter. You get richness without turning the batter into soup.
Third: measuring the bananas.
I know it sounds fussy. But eyeballing the banana quantity is one of the most common mistakes people make. Too little banana and you lose that deep, sweet flavor. Too much and the center of the loaf turns dense and wet. Hitting that 1½ cup mark consistently is what makes the difference.
Put all three of those elements together and you get a loaf that’s soft without being gummy, sweet without being cloying, and flavorful right through to the very last slice.
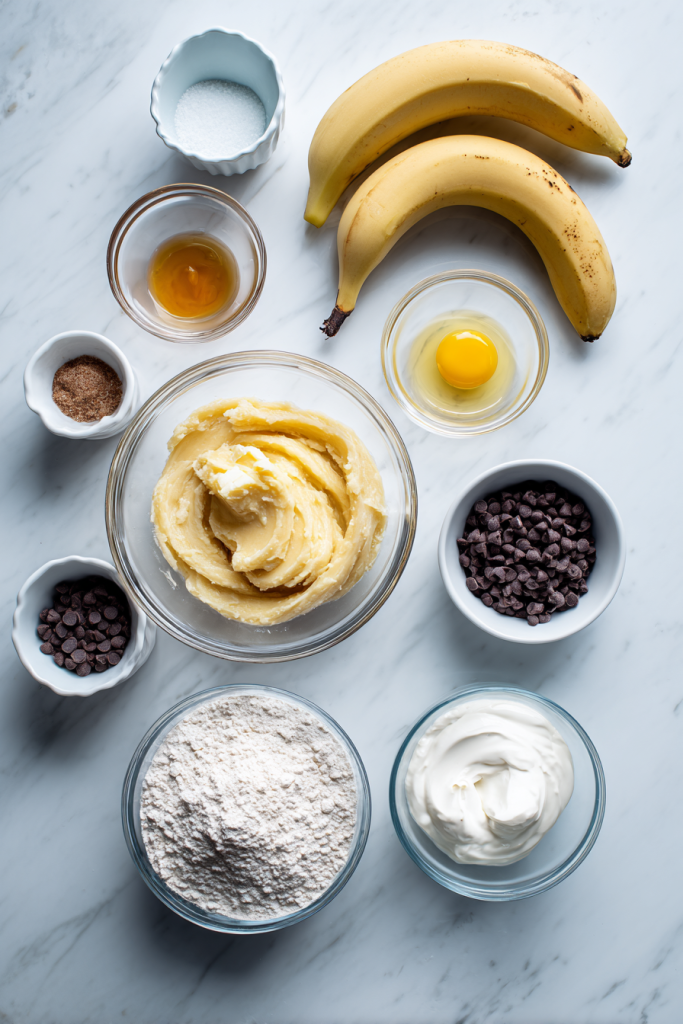
Ingredients at a Glance
| Ingredient | Quantity | Notes |
|---|---|---|
| Ripe mashed bananas | 1½ cups / 380g | 3-4 medium bananas; measure after mashing |
| Light brown sugar (packed) | ½ cup / 100g | Adds caramel depth and moisture |
| Granulated sugar | ½ cup / 100g | Balances the overall flavor |
| Unsalted butter, melted | ½ cup / 112g | Melted, not softened — key for texture |
| Large eggs | 2 | Room temperature preferred |
| Vanilla extract | 1 tsp | Pure vanilla, not imitation |
| 2% Greek yogurt | ½ cup / 120g | Sour cream works as a substitute |
| All-purpose flour | 1⅓ cups / 172g | Or 1-to-1 gluten-free baking flour |
| Baking soda | 1 tsp | Make sure it’s fresh for the best rise |
| Salt | ½ tsp | Enhances every other flavor in the loaf |
| Mini chocolate chips | ¾ cup + handful / ~150g | Extra handful reserved for sprinkling on top |
Recipe Timing and Yield
| Prep Time | Cook Time | Total Time | Servings | Difficulty |
|---|---|---|---|---|
| 15 minutes | 60-75 minutes | About 1.5 hours | 1 loaf (10-12 slices) | Easy |
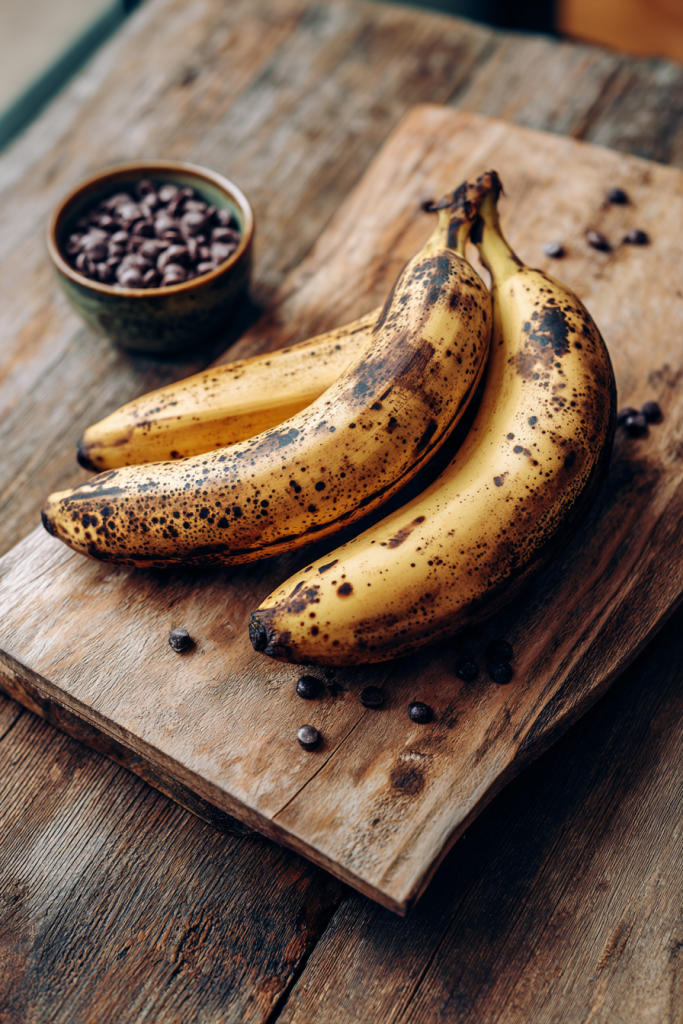
A Note on Bananas: The Riper, The Better
Here’s something worth saying clearly: the ripeness of your bananas directly determines how good this bread tastes.
You want bananas that are well past yellow. Look for peels that are heavily spotted, mostly brown, or even nearly black. Those overripe bananas are sweeter, softer, and far easier to mash into a smooth consistency. They also bring a depth of banana flavor that firm yellow bananas simply cannot match.
No ripe bananas on hand? No problem. A few ways to speed things up:
- Oven method: Place unpeeled bananas on a baking sheet. Bake at 300°F for about 15-20 minutes until the skins turn completely black. Let them cool fully before peeling and using.
- Paper bag method: Put your bananas in a paper bag with an apple overnight. They release ethylene gases together, which speeds up the ripening process naturally.
- Frozen bananas: Already frozen bananas work beautifully here. Just thaw them completely and drain any excess liquid before you measure and mash.
Baker’s Tip: Running a little short on mashed banana? Top off your measurement with plain unsweetened applesauce. It blends right in, keeps the moisture level exactly where it needs to be, and you won’t taste any difference.
How to Make Moist Chocolate Chip Banana Bread
Good news. This recipe comes together in one main bowl after whisking the dry ingredients separately. No stand mixer. No complicated techniques. Just solid method and a gentle hand with the batter.
Step 1: Preheat and Prepare the Pan
Set your oven to 325°F (165°C). Grease a 9×5 inch loaf pan generously with butter or non-stick spray, then line it with parchment paper. Let the parchment hang over both long sides of the pan.
Why? Because that overhang creates a natural sling. When the loaf is done, you just grab the parchment and lift the whole thing out cleanly. No stuck edges, no wrestling with the pan.
Step 2: Whisk the Dry Ingredients
In a medium bowl, whisk together the flour, baking soda, and salt. Set it aside.
This one small step matters more than it seems. Whisking before adding to the wet mixture ensures the baking soda and salt are evenly spread through the batter. Without this, you can end up with oddly bitter pockets in certain bites. Takes thirty seconds. Worth every one of them.
Step 3: Combine Butter and Sugars
In a large mixing bowl, stir together the melted butter, brown sugar, and granulated sugar. Whisk vigorously for about 1-2 minutes until the mixture looks thick and paste-like.
Don’t rush this step. Working the sugars into the butter helps them start to dissolve and builds a smooth, even base for everything else that goes in.
Step 4: Add the Wet Ingredients
Add your mashed bananas to the butter-sugar mixture and stir until combined. Then add both eggs, followed by the vanilla extract and Greek yogurt. Mix until everything looks uniform and evenly blended.
Take an extra few seconds to scrape down the sides of the bowl. It’s easy for butter or banana to hide along the edges, and you want everything fully incorporated before the next step.
Step 5: Fold in the Dry Ingredients
Pour your dry ingredient mixture into the wet bowl. Using a spatula or wooden spoon, fold gently until no flour streaks remain.
Do not overmix.
Once the flour goes in, gluten starts developing every time you stir. Overwork the batter and you’ll end up with a tough, dense loaf instead of a tender one. The moment you stop seeing dry flour, stop stirring. A few lumps? Totally fine. Better to undermix by a stroke than overmix by five.
Step 6: Fold in the Chocolate Chips
Fold in the ¾ cup of mini chocolate chips with just a few slow strokes.
Mini chips are the right call here. They distribute evenly through the batter instead of sinking to the bottom, which means you get chocolate in every single bite rather than a loaded bottom layer. Pour and scrape the batter into your prepared loaf pan and smooth the top with the back of your spatula.
Step 7: Add the Topping and Bake
Scatter that reserved handful of mini chocolate chips across the top of the batter. This is what gives the finished loaf those gorgeous visible chips — the ones that make it look as good as it actually tastes.
Slide the pan into your preheated oven and bake for 60-75 minutes.
Oven Tip: Check for doneness at the 60-minute mark. Insert a toothpick straight into the very center of the loaf. It should come out with just a few moist crumbs clinging to it — not wet batter. Still wet? Bake in 5-minute increments and test again each time.
Step 8: Cool Completely Before Slicing
This is genuinely the hardest part of the whole recipe.
Let the banana bread rest in the pan on a wire rack for at least 20-30 minutes. Then lift it out using the parchment sling and let it finish cooling on the rack before you slice. Cutting into it while it’s still warm releases trapped steam, which can turn the center gummy and soft in the wrong way.
I know it’s tempting. Wait anyway.
Common Mistakes to Avoid
Even simple recipes have pitfalls. Here are the ones that trip people up most often with banana bread:
Pan size matters. Always use a 9×5 inch loaf pan. A smaller 1-pound pan looks almost identical on the shelf, but it cannot hold this volume of batter properly. You’ll get overflow or a badly sunken center.
Measure the flour correctly. Spoon flour into your measuring cup and level it off with a straight edge. Scooping directly from the bag compacts the flour and can sneak in up to 30% more than the recipe calls for. That extra flour is one of the biggest culprits behind dry, heavy banana bread.
Don’t walk away too early. Every oven runs a little differently. Start checking at 60 minutes, but some loaves genuinely need the full 75. An underbaked center looks fine coming out of the oven — and then collapses completely as it cools.
Avoid a sunken center. Two causes. One: overmixing after the flour goes in builds gluten that traps air, and that air escapes during baking, pulling the top down with it. Two: using a pan that’s too small. Gentle mixing plus the right pan solves both.
Storing Your Banana Bread
| Storage Method | Duration | Tips |
|---|---|---|
| Room temperature | Up to 3 days | Wrap tightly in plastic wrap or store in an airtight container |
| Refrigerator | Up to 5 days | Wrap well first — unwrapped, the fridge dries it out fast |
| Freezer | Up to 3 months | Slice first, wrap slices individually, freeze in a zip-top bag |
Pro Tip: This bread actually tastes better on day two. The flavors deepen overnight and the texture settles into something wonderfully fudgy. If you can, bake it the day before you need it. I rarely manage to wait that long, but when I do — worth it.
Substitutions and Variations
One of the best things about this recipe is how forgiving it is. The core technique stays the same no matter what swaps you make.
| Ingredient | Substitution | Notes |
|---|---|---|
| Greek yogurt | Sour cream (equal amount) | Same thick, tangy quality — works perfectly |
| Greek yogurt | Plain unsweetened yogurt | Slightly thinner; bread will still be moist |
| All-purpose flour | 1-to-1 gluten-free baking flour | Bob’s Red Mill or King Arthur both work reliably |
| Granulated + brown sugar | Coconut sugar (same total amount) | Refined sugar-free option; adds a slight caramel note |
| Mini chocolate chips | Regular semi-sweet chips | May sink a little more; still delicious |
| Mini chocolate chips | Chopped walnuts or pecans | Great nut-lover’s version; combine both if you want |
| Mini chocolate chips | Butterscotch or peanut butter chips | Fun flavor twist that pairs well with banana |
Frequently Asked Questions
Can I make this recipe gluten-free?
Absolutely. Swap the all-purpose flour for a 1-to-1 gluten-free baking flour at the exact same measurement. Cup-for-cup blends work best here because they already contain xanthan gum, which provides the structure the loaf needs. Skip almond flour or coconut flour entirely — those require completely different ratios and will not behave the same way in this recipe.
Can I use plain yogurt instead of Greek yogurt?
Yes, plain unsweetened yogurt works as a substitute. Just know that regular yogurt contains more water than Greek yogurt, so your batter may end up slightly thinner. The bread will still be moist. If you want to get closer to the original texture, drain your regular yogurt through a fine-mesh strainer for about 10 minutes before using it. That removes some of the extra liquid and thickens it up a bit.
Can I reduce the sugar?
Sugar does more than add sweetness — it contributes directly to moisture and texture. Cut it too much and the bread will come out noticeably drier and denser. If you want a lower-sugar option, replace both sugars with an equal total amount of coconut sugar instead of reducing the quantity. Avoid cutting the overall amount by more than about 20%, because the balance of the recipe really does depend on it.
Why did my banana bread sink in the middle?
Two most likely causes. First: overmixing after the flour goes in. Overworked batter develops too much gluten, which traps air bubbles that eventually escape during baking and pull the top down with them. Mix only until the flour disappears — a few extra seconds can make the difference between a domed top and a sunken one. Second: using a pan that’s too small. A 1-pound pan looks almost identical to a 9×5 (1.25 lb) pan on the shelf, but it cannot hold this volume of batter properly. The right pan matters more than most people realize.
Do I have to use chocolate chips? Can I leave them out?
Of course. The base recipe is a great banana bread on its own without any mix-ins at all. Leave out the chocolate chips entirely for a classic version. Or swap them for something different — toasted walnuts, pecans, a mix of both, dried cranberries, or even a handful of shredded coconut. All of those work beautifully with the banana base.
A Few Final Thoughts
This chocolate chip banana bread has earned a permanent spot in my regular baking rotation.
It’s what I make when people are coming over and I want something that feels special without taking all day. It’s what I reach for when I want the house to smell incredible. And honestly, it’s what I make whenever those spotted bananas on the counter have officially gone too far for anything else.
The recipe is forgiving. No Greek yogurt? Use sour cream. Need it gluten-free? Swap the flour. Want nuts instead of chips? Go for it. The technique stays the same no matter what, and it works.
Next time those bananas go past their prime — don’t throw them out. Make this instead. I think it’ll become your go-to recipe too.
Happy baking!
Chocolate Chip Banana Bread
Ingredients
Wet Ingredients
- 1½ cups ripe mashed bananas about 3-4 medium bananas; measure after mashing
- ½ cup unsalted butter melted, not softened
- 2 large eggs room temperature preferred
- ½ cup 2% Greek yogurt full-fat; sour cream works as substitute
- 1 tsp vanilla extract pure vanilla, not imitation
Dry Ingredients
- ½ cup light brown sugar packed
- ½ cup granulated sugar
- 1⅓ cups all-purpose flour or 1-to-1 gluten-free baking flour
- 1 tsp baking soda make sure it’s fresh
- ½ tsp salt
Mix-Ins & Topping
- ¾ cup mini chocolate chips folded into batter
- 1 handful mini chocolate chips reserved for sprinkling on top
Instructions
- Preheat your oven to 325°F (165°C). Grease a 9×5 inch loaf pan with butter or non-stick spray and line with parchment paper, letting it hang over both long sides to create a sling for easy removal.
- In a medium bowl, whisk together the all-purpose flour, baking soda, and salt until evenly combined. Set aside.
- In a large mixing bowl, whisk together the melted butter, brown sugar, and granulated sugar vigorously for 1-2 minutes until the mixture looks thick and paste-like.
- Add the mashed bananas to the butter-sugar mixture and stir to combine. Add the eggs, vanilla extract, and Greek yogurt. Mix until everything is uniform and evenly blended. Scrape down the sides of the bowl.
- Pour the dry ingredient mixture into the wet bowl. Using a spatula or wooden spoon, fold gently until no flour streaks remain. Do not overmix — stop as soon as the flour disappears. A few lumps are perfectly fine.
- Fold in the ¾ cup of mini chocolate chips with just a few slow strokes. Pour and scrape the batter into the prepared loaf pan and smooth the top with the back of your spatula.
- Scatter the reserved handful of mini chocolate chips evenly across the top of the batter. Slide the pan into the preheated oven and bake for 60-75 minutes. Check for doneness at 60 minutes by inserting a toothpick into the center — it should come out with just a few moist crumbs. If wet batter remains, bake in 5-minute increments and test again.
- Let the banana bread rest in the pan on a wire rack for 20-30 minutes. Then lift it out using the parchment sling and allow it to cool completely on the rack before slicing.