You know what I love?
A meal that dirties exactly one pan.
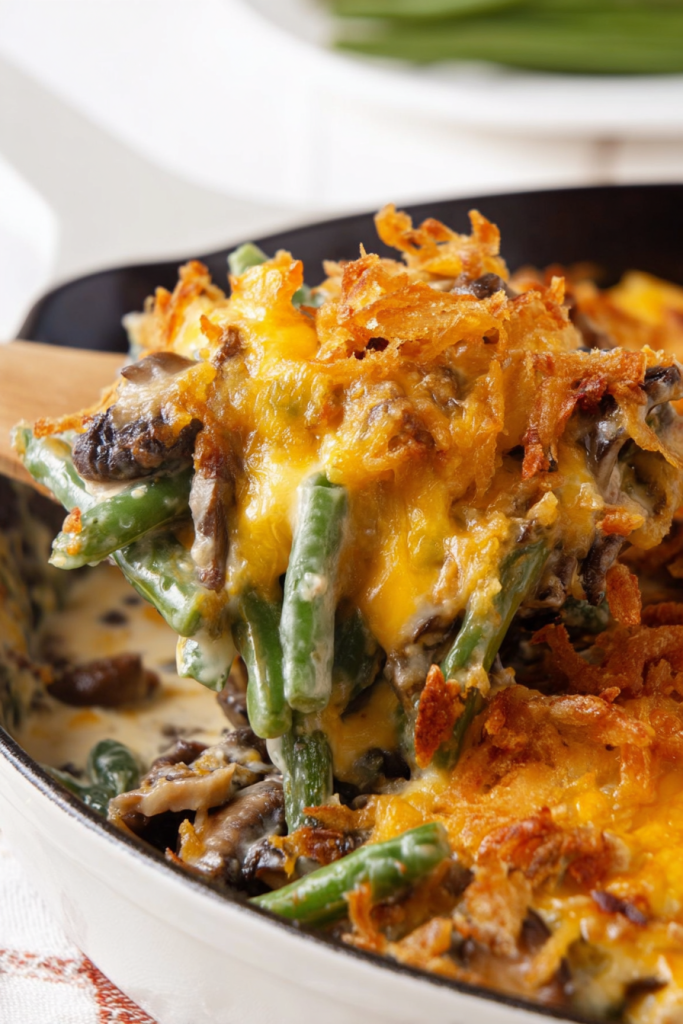
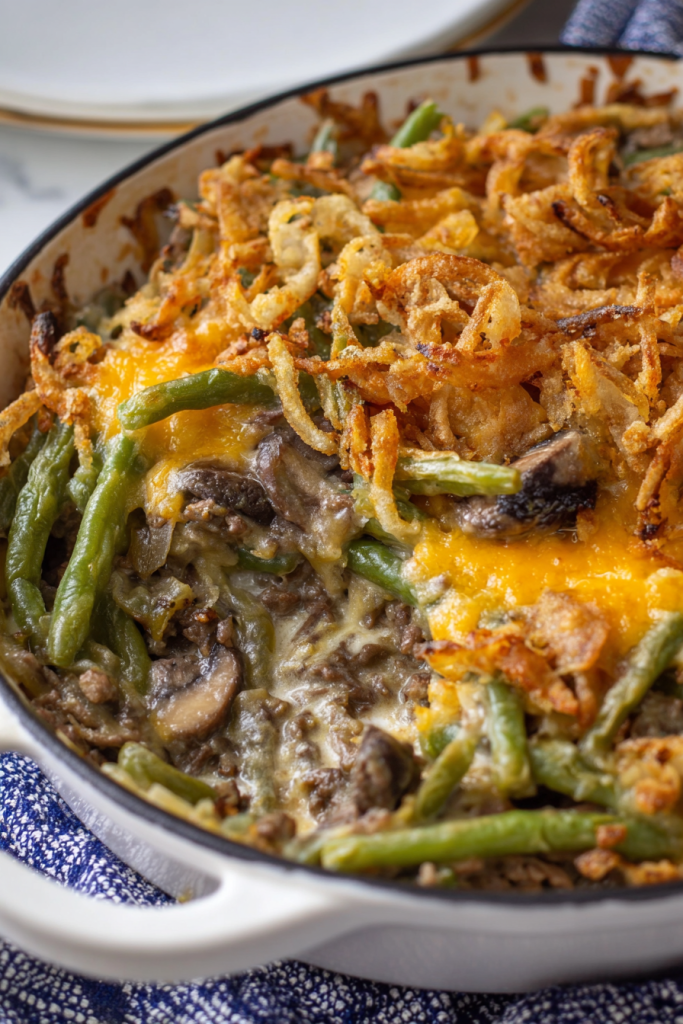
This ground beef green bean casserole is exactly that kind of recipe. Rich flavors, zero fuss, and I’m not stuck doing dishes for an hour afterward. I’ve honestly lost count of how many times I’ve made this.
Here’s the thing about this recipe—it’s stupidly simple. Green beans hang out with seasoned beef and mushrooms. Everything gets coated in this creamy sauce. Then you top it with cheese that melts into pure heaven.
Comfort food. Ready in 25 minutes. That’s it.
Why I Keep Making This Casserole
I found this recipe during one of those “I need dinner NOW” moments.
Traditional casseroles? They usually call for those canned cream soups. You know the ones. This version uses actual food. Real ingredients you can actually identify.
The result?
It tastes fresh. Vibrant. Not like something that sat on a shelf for two years.
And let me tell you—this meal fills you up. Like, actually keeps you full. I’m not raiding the pantry an hour later looking for snacks. The beef brings the protein. The vegetables add nutrition and that nice crunch. The dairy? That’s what makes it feel like a warm hug.
But here’s what really sold me.
Everything cooks in one skillet.
The flavors build on each other as you go. Each ingredient adds its own thing to the party. By the end, you’ve got this beautiful blend that tastes like you spent way more time than you actually did.
Let’s Talk Ingredients
The ground beef is your foundation here. I grab the 80/20 blend because I’m not trying to eat cardboard. That little bit of fat? It keeps everything juicy and adds serious flavor.
Green beans bring the freshness.
You can use fresh beans if you’re feeling fancy—just trim them first. Or grab a bag of the pre-washed kind and save yourself ten minutes. Frozen works too. Whatever’s in your freezer right now is probably fine.
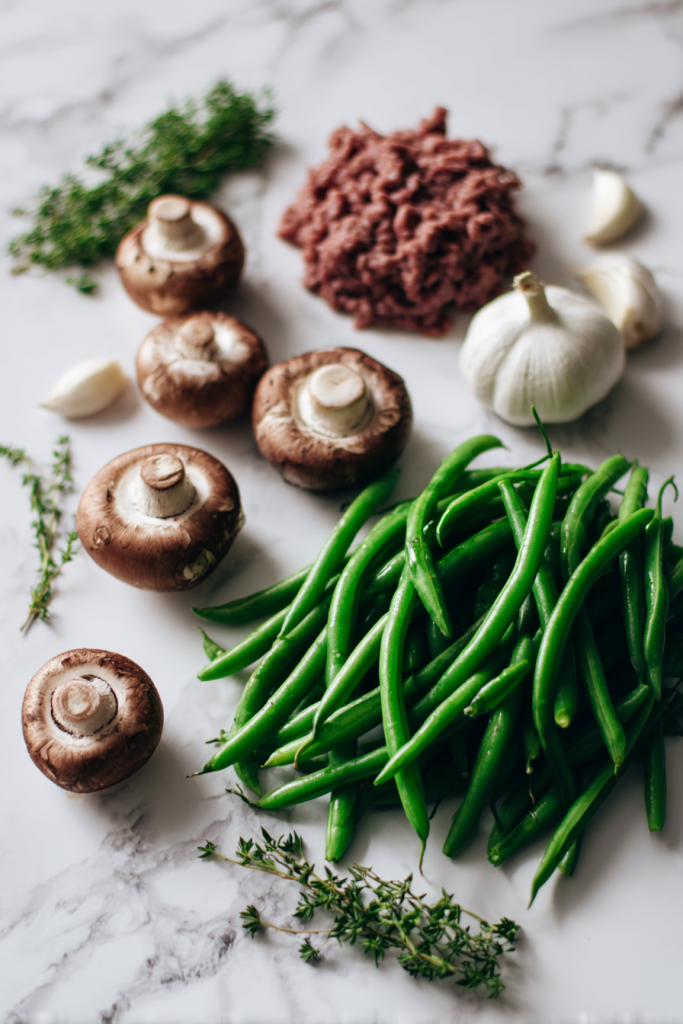
The aromatics are where the magic starts.
Onions. Garlic. Mushrooms. These three create the flavor base that makes your kitchen smell incredible. The mushrooms add this earthy, meaty thing that pairs so well with the beef.
Now the dairy situation.
Cream cheese melts down into this silky base. Sour cream adds that tangy kick. And the Colby Jack on top? That becomes gooey, melted perfection. Together, they create a sauce that sticks to everything just right.
What You’ll Need
| Ingredient | Quantity | Notes |
|---|---|---|
| Ground beef | 1 lb | 80/20 blend recommended |
| Green beans | 2 cups | Fresh, trimmed or frozen |
| Onion | 1 cup, diced | Yellow or white onion |
| Mushrooms | 1 cup | Sliced button or cremini |
| Garlic | 3 tsp, minced | Fresh preferred |
| Beef/chicken broth | ¼ cup | Low sodium works best |
| Sour cream | ⅓ cup | Full-fat for richness |
| Cream cheese | 2 tbsp | Softened at room temp |
| Sea salt | ½ tsp | Adjust to taste |
| Black pepper | ½ tsp, ground | Freshly ground preferred |
| Worcestershire sauce | ½ tsp | Adds umami depth |
| Colby Jack cheese | 2 cups, shredded | Reduce to 1 cup if desired |
| Dried thyme | ⅛ tsp | Adds herbal note |
SEGMENT 2: LET’S COOK THIS THING
Get Your Stuff Ready
Before I even turn on the stove, I get everything out and measured.
Seriously. Do this.
It makes cooking feel like you’re on one of those cooking shows instead of a frantic mess. Grab a large skillet. Cast iron is my favorite for this, but we’ll get to why in a second.
The beauty of cast iron?
It goes from stovetop straight into the oven. True one-pan cooking. If you don’t have one, no big deal. Any large skillet works. You’ll just move everything to a baking dish at the end for the cheese part.
How to Make It (Step by Step)
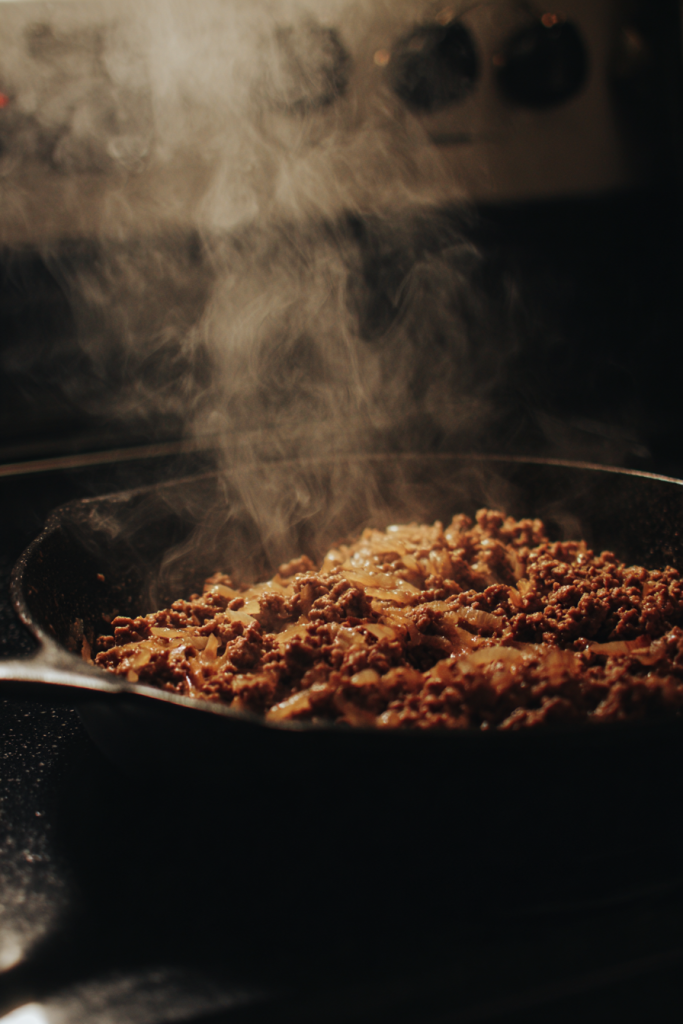
Step 1: Brown That Beef
Put your skillet on medium heat.
Toss in the ground beef. Break it up with a wooden spoon, but then—and this is important—leave it alone for a minute or two. Let it get that brown crust. That’s where the flavor lives.
Keep cooking, stirring now and then, until there’s no pink left.
About 5 minutes total. You want it evenly browned with some crispy bits. Those caramelized edges? They’re flavor bombs waiting to happen.
Now here’s the trick I learned the hard way:
Don’t drain ALL the grease.
Keep about a tablespoon in the pan. I know, I know. But trust me. That fat carries flavor that olive oil just can’t match. Take the beef out and set it aside.
Step 2: Get Those Aromatics Going
Drop your diced onions into that warm skillet with the beef fat.
The heat and fat create this perfect cooking environment. Let them cook for 3-4 minutes, stirring every so often. They’ll turn translucent and smell amazing.
Then add the mushrooms.
They’ll release water as they cook. That’s normal. Let them hang out for 2 minutes. Some of that liquid evaporates. The mushrooms shrink a bit and get these golden edges.
Perfect.
Step 3: Green Beans Time
Toss in your green beans and garlic.
The garlic hits that hot pan and just blooms—releasing all those aromatic oils. Pour in the broth. This helps steam the beans so they get tender without getting mushy.
Cook everything for 2-3 minutes.
The beans should soften but still have a little snap. The broth mostly cooks off, leaving concentrated flavor behind. Stir it around so the garlic gets everywhere.
Step 4: Make It Creamy
Turn your heat down to medium-low.
This is crucial. High heat will make the dairy separate and get weird. Add the cream cheese first. Stir as it melts into the vegetables.
It’ll clump at first. That’s fine. Just keep stirring gently.
As it softens, it coats everything smooth. Then add the sour cream. Mix it in thoroughly. Watch the mixture transform into this gorgeous sauce that hugs every piece of vegetable.
This is my favorite part.
Step 5: Bring It All Together
Put that browned beef back in.
Add your salt, pepper, thyme, and Worcestershire sauce. Stir everything together gently—you don’t want to destroy the vegetables.
The Worcestershire adds this subtle savory thing that’s hard to describe. The thyme brings an earthy note. Everything just… works together.
Taste it right now.
Does it need more salt? More pepper? Adjust it to your liking.
Step 6: The Cheese Situation
Sprinkle that Colby Jack evenly over the top.
Don’t stir it in. You want a full cheese blanket covering everything. This creates that melted cheese layer that makes people go back for seconds.
Now you’ve got two ways to finish this:
Option 1: If you’re using cast iron, stick the whole pan under the broiler. Watch it like a hawk for 2 minutes. The cheese will bubble, brown, and get gloriously melted.
Option 2: Keep it on the stovetop. Drop the heat to low and cover with a lid. Let it sit 3-4 minutes until the cheese melts. You won’t get the browned top this way, but the cheese will still be perfectly gooey.
Things I’ve Learned Making This a Million Times
First thing: Don’t skip that tablespoon of beef grease.
I tried using all olive oil once. It wasn’t the same. The beef fat carries flavor you just can’t get anywhere else.
Second: Want it saucier?
Add more broth. Start with an extra ¼ cup. You can always add more later. You can’t take it back out. The consistency should coat a spoon without being soupy.
Third: Shred your own cheese.
I know pre-shredded is easier. But it has anti-caking stuff that prevents smooth melting. Fresh-shredded cheese from a block melts into this creamy, cohesive topping that’s so much better.
Oh, and if you’re watching carbs?
This recipe is naturally pretty low in them. Full-fat dairy keeps it keto-friendly too. The whole dish has minimal carbohydrates, which makes it work for lots of different eating styles.
How to Serve It
I just bring the skillet straight to the table.
It looks good. Keeps everything warm. Pair it with a simple green salad and you’ve got a complete meal.
The portions are pretty generous. Four servings will satisfy hungry people. If you’re feeding kids or want leftovers (which you should—they’re great), this could stretch to six servings.
Leftovers reheat like a dream in the microwave or oven.
For family dinners, I put the skillet on a trivet at the table. Everyone grabs their own portion. It’s casual. Fits the vibe of the dish perfectly.
SEGMENT 3: MAKE IT YOURS
Ways to Change It Up
One of my favorite things about this recipe?
You can mess with it.
Don’t like mushrooms? Skip them. Add more green beans instead. Your kids won’t eat green beans? Try broccoli. (I’ve done it—works great.)
The cheese amount is totally up to you.
I’m a “two cups of cheese” person because more cheese is always better. But one cup makes a lighter version that’s still delicious. Do what feels right.
Not into Colby Jack?
- Try cheddar
- Monterey Jack works
- Pepper jack if you like spice
- Even mozzarella is fine
Each cheese brings something different. None of them are wrong.
Need to Feed More People?
This doubles beautifully.
Use a bigger skillet or split it between two pans. When you get to the cheese step, transfer everything to a 9×13 baking dish.
The cooking times stay pretty much the same. Maybe add an extra minute or two for the vegetables. Watch the texture instead of the clock.
Doubled portions are perfect for meal prep too.
Make it fresh one night. Freeze portions for those nights when cooking feels impossible. The flavors actually get better after sitting in the fridge for a day.
Storing and Reheating
Leftovers go in an airtight container.
They’ll keep for four days. The texture and flavor hold up really well. I make this on Sundays sometimes so I have easy dinners ready during the week.
To reheat:
Microwave individual portions for 2-3 minutes. Stir halfway through for even heating.
For bigger portions, oven at 350°F for about 15 minutes.
If you’re using the oven, cover it with foil first. This stops the cheese from drying out. Take the foil off for the last few minutes to wake up that cheese topping.
Questions People Always Ask
Can I use ground turkey instead of beef?
Yes!
Ground turkey makes a lighter version. It’s leaner though, so add a splash of olive oil when browning. This prevents sticking and adds moisture back in.
Cooking time stays the same. Just make sure the turkey hits 165°F internally.
What if I don’t have fresh green beans?
Frozen green beans work perfectly.
Skip the initial cooking step with frozen. Just add them when you’d add fresh beans. Canned beans work too, though they’ll be softer. Drain them really well before adding—you don’t want excess liquid making things watery.
Is there a substitute for Worcestershire sauce?
Try soy sauce or tamari for that same savory quality.
Coconut aminos work if you want something gentler. Use the same amount the recipe calls for. Each one brings slightly different notes, but they all enhance the taste.
Can I make this ahead?
Totally.
Make everything through Step 5, then refrigerate. When you’re ready to eat, warm it back up on the stovetop. Add the cheese and melt as directed.
This is perfect when you’re having people over and don’t want to be stuck in the kitchen.
How do I stop the cheese from getting greasy?
Freshly shredded cheese helps prevent this.
Pre-shredded stuff has additives that can cause oiliness. Also, don’t overheat when melting. Medium-low to low heat lets it melt gently without breaking apart. If you notice separation, just stir it back together.
Final Thoughts
This casserole has become my go-to weeknight dinner.
It delivers on taste. It’s got nutrition. And it’s convenient as heck. One pan means I’m not standing at the sink for twenty minutes after dinner.
The textures keep things interesting too.
Tender beef. Crisp-tender beans. Creamy sauce. Every bite is satisfying. The melted cheese on top is just the cherry on the sundae.
I hope you love making this as much as I do.
It’s one of those recipes that becomes automatic after a few tries. Soon you’ll be adjusting the seasonings without thinking. Making it completely your own.
Busy weeknight? Make this.
Casual weekend dinner? Make this.
Simple ingredients turn into something special when you treat them right. That’s what good home cooking is all about.

Ground Beef Green Bean Casserole
Ingredients
- 1 lb ground beef 80/20 blend recommended
- 2 cups green beans fresh trimmed or frozen
- 1 cup onion diced, yellow or white
- 1 cup mushrooms sliced, button or cremini
- 3 tsp garlic minced, fresh preferred
- 1/4 cup beef or chicken broth low sodium works best
- 1/3 cup sour cream full-fat for richness
- 2 tbsp cream cheese softened at room temperature
- 1/2 tsp sea salt adjust to taste
- 1/2 tsp black pepper ground, freshly ground preferred
- 1/2 tsp Worcestershire sauce
- 2 cups Colby Jack cheese shredded, reduce to 1 cup if desired
- 1/8 tsp dried thyme
Instructions
- Heat a large skillet (cast iron preferred) over medium heat. Add ground beef and break it up with a wooden spoon. Let it cook undisturbed for 1-2 minutes to develop a brown crust, then continue cooking for about 5 minutes total until no pink remains. Keep about 1 tablespoon of grease in the pan and remove the beef, setting it aside.
- In the same skillet with the reserved beef fat, add diced onions. Cook for 3-4 minutes, stirring occasionally, until translucent. Add mushrooms and cook for 2 minutes until they release water and develop golden edges.
- Add green beans and minced garlic to the skillet. Pour in the broth and cook for 2-3 minutes until beans are tender but still have a slight snap. The broth should mostly cook off.
- Reduce heat to medium-low. Add cream cheese and stir as it melts into the vegetables. Once smooth, add sour cream and mix thoroughly until a creamy sauce forms that coats everything.
- Return the browned beef to the skillet. Add salt, pepper, thyme, and Worcestershire sauce. Stir gently to combine without breaking up the vegetables. Taste and adjust seasonings as needed.
- Sprinkle Colby Jack cheese evenly over the top. Either place the skillet under the broiler for 2 minutes (watch carefully) until cheese is bubbly and browned, OR cover with a lid and cook on low heat for 3-4 minutes until cheese melts.
- Serve immediately from the skillet. Pair with a simple green salad for a complete meal.