Fall hits different when you’ve got pecan pie season to look forward to.
You know that moment when you bite into a warm slice? The gooey filling. The nutty crunch. That buttery, flaky crust.
Pure magic.
But here’s what always drove me crazy: serving full-sized pies at holiday gatherings. The mess? Brutal. The uneven slices? Frustrating. Trying to get everyone served quickly while the pie’s still warm? Nearly impossible.
Then I tried making these in a muffin tin.
Everything changed.
These little guys give you all the flavor of traditional pecan pie. But better. Because:
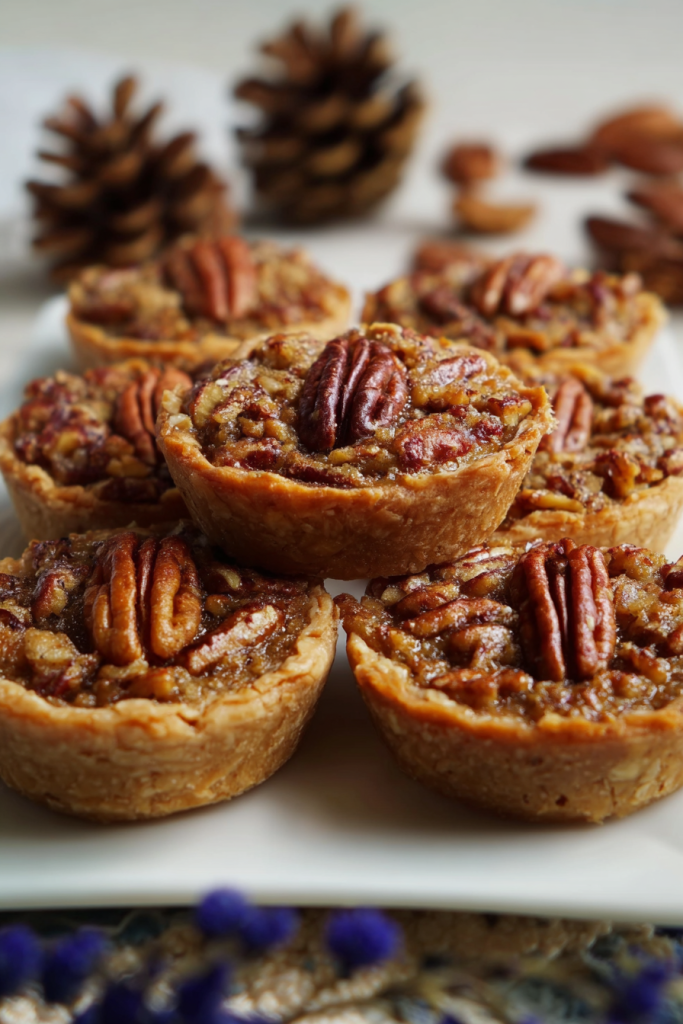
- They’re perfectly portioned
- Super easy to serve
- No utensils needed
- They look adorable on any table
I made my first batch three years ago for a family potluck.
Gone in minutes.
My aunt actually pulled me aside and whispered, “Did you buy these from a bakery?” Best compliment ever. Now they’re my go-to for every holiday celebration.
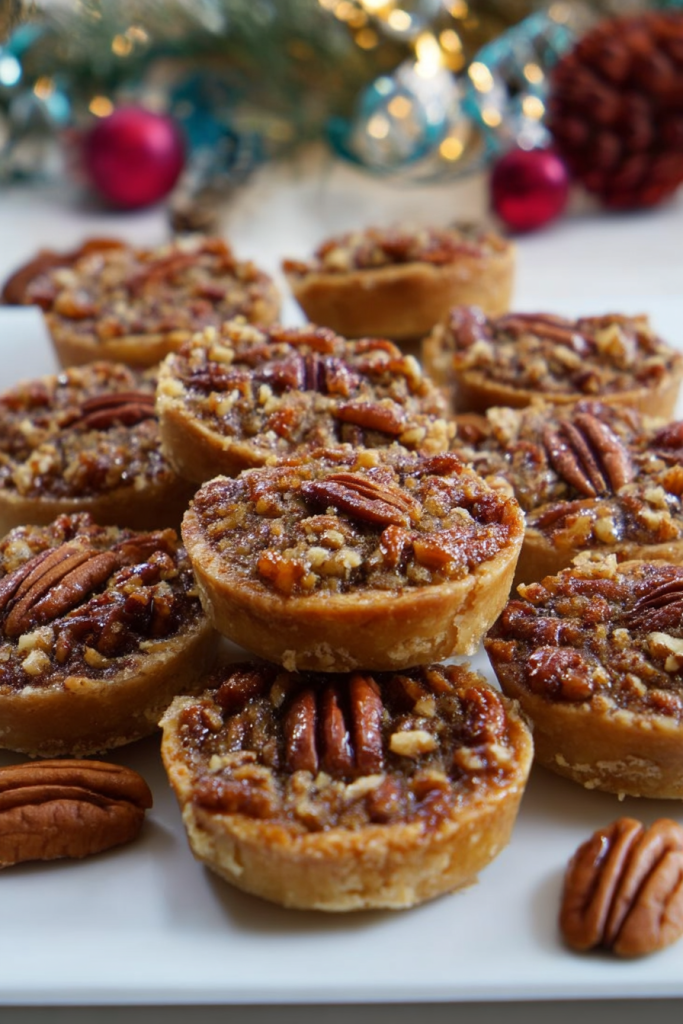
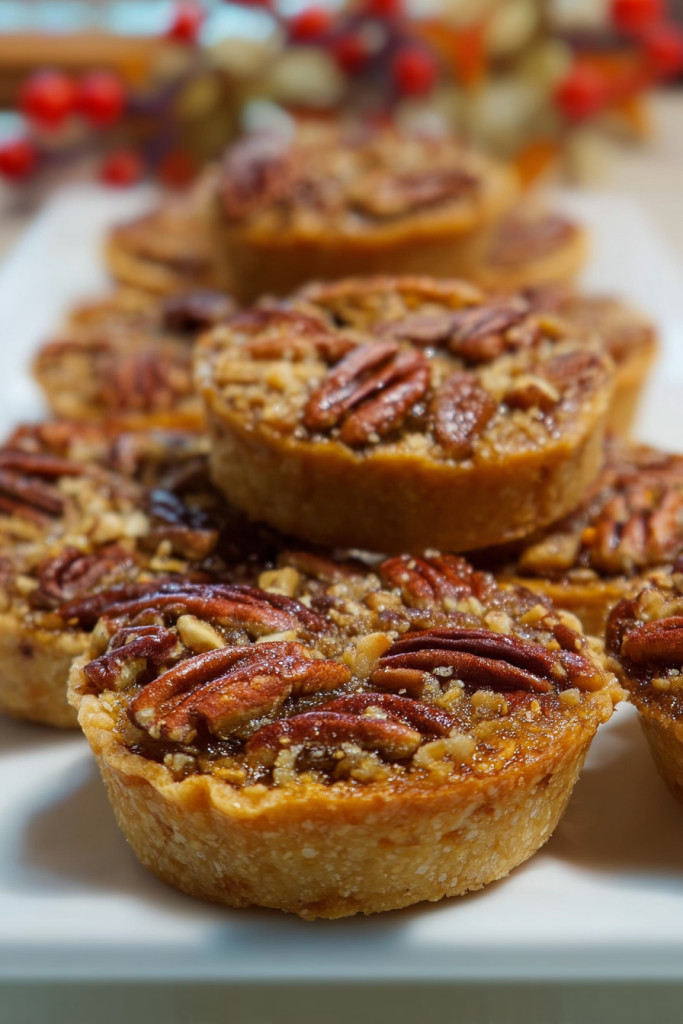
Here’s What Makes Them Special
The texture? Perfect.
You get that crispy, flaky crust that just shatters when you bite into it. The filling stays wonderfully gooey in the middle. And it develops this slightly caramelized top that’s… chef’s kiss. Those toasted pecans add the crunch that brings everything together.
The convenience? Unbeatable.
No serving spoons. No plates (if you’re doing casual). Just grab one and go.
Plus, everyone gets the exact same portion. No arguments about who got the bigger slice.
The time savings? Huge.
A regular pecan pie takes 50-60 minutes to bake.
These? Done in 20.
That’s a massive win when you’re juggling multiple dishes during holiday prep.
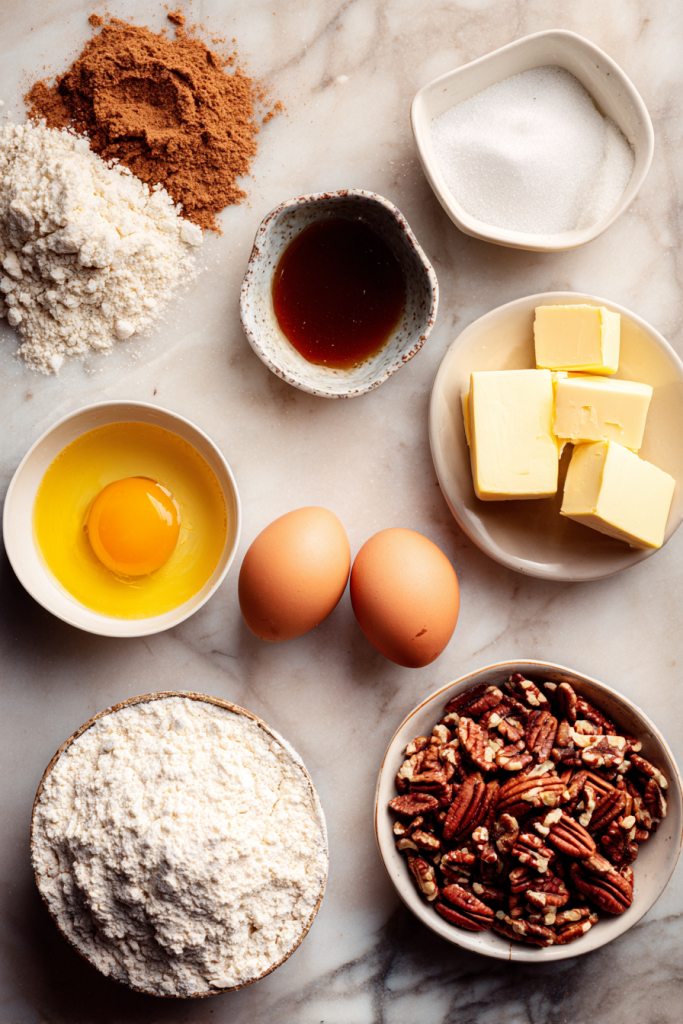
What You’ll Need
Let’s talk ingredients. The list is refreshingly simple. You probably have half of this stuff already.
| Ingredient | Quantity | Notes |
|---|---|---|
| Store-bought pie crust | 1 package (2 crusts) | Refrigerated roll-out style works best |
| Chopped pecans | 1¼ cups | Fresh pecans give the best flavor |
| Light corn syrup | ⅔ cup | Essential for that gooey texture |
| Light brown sugar | ⅓ cup | Adds caramel notes |
| Large eggs | 2 | Room temperature, lightly beaten |
| Melted butter | 3 tablespoons | Unsalted preferred |
| Vanilla extract | 1 teaspoon | Pure extract recommended |
| Ground cinnamon | ¼ teaspoon | Optional but delicious |
| Salt | ¼ teaspoon | Balances the sweetness |
About that store-bought crust:
Look, I know some baking purists will judge me. But this is my secret weapon. The refrigerated version works beautifully. I’ve tested both homemade and store-bought dozens of times.
Guests can’t tell the difference.
Plus, you save like 30 minutes. During the holidays, that time matters.
About the pecans:
Buy whole pecan halves and chop them yourself.
Why?
Pre-chopped pecans sitting in those bags? They taste stale. They’ve lost that fresh, buttery flavor. Just give yours a rough chop. You want different sizes mixed in there. Better texture in every bite.
Let’s Bake These Things
Ready to get started? This is way easier than you think. Even if baking isn’t your strong suit, you’ve got this.
First Things First: Prep Your Space
Preheat that oven to 350°F.
Not 375°F. Not 325°F. Exactly 350°F.
Go hotter? Your crusts brown too fast before the filling sets. I learned this the hard way. My first batch looked perfect on top but was raw in the middle. Not cute.
Grab your standard 12-cup muffin tin. Spray every single cavity with nonstick cooking spray. And I mean generous amounts. Don’t be shy.
Hit the bottom. The sides. Even the top of the pan between the cups.
Those stuck edges? They’ll ruin your day. Trust me.
Want a game-changer tip?
Cut small strips of parchment paper. Lay one across the bottom of each cup. Let the ends stick up like little handles.
When your pies are done? You just lift those handles and they pop right out.
Life. Changing.
Working With Your Pie Crust
Unroll that first crust onto a lightly floured surface.
Just a light dusting of flour. You want to prevent sticking without making the dough tough and chewy.
Roll it out gently. You’re aiming for a 12-inch circle. About ⅛-inch thick.
Now grab your 3-inch round cookie cutter.
Don’t have one? No problem. A drinking glass works perfectly. Just measure the rim first.
Cut your circles as close together as possible. You’re trying to minimize waste here. You should get 12 circles from each crust if you position them right.
Now for the fun part.
Gently press each circle into a muffin cup. Use your fingers to mold it against the bottom and sides. It should come about halfway up each cup.
Check for tears or holes.
Any gaps = filling leaks through during baking = sad, messy pies.
Repeat with your second crust. Got leftover scraps? Gather them up, reroll gently, and cut more circles. You should end up with 24 perfect little crusts.
Making That Gooey Pecan Filling
Grab a large mixing bowl.
Toss in the brown sugar, melted butter, and corn syrup. Whisk them together hard. Really get in there. You want the mixture smooth and the sugar starting to dissolve.
No streaks of butter. Everything blended.
Add your vanilla extract, cinnamon, and salt.
Whisk again.
The mixture should look glossy now. And smell incredible. If you’re not tempted to eat it with a spoon, you’re stronger than me.
Time for the pecans.
Fold them in. Stir until every single piece is coated with that sweet, buttery goodness.
This is the magic moment. You’re making that signature pecan pie filling everyone goes crazy for.
Last step: add your lightly beaten eggs.
Stir gently but thoroughly. You want everything combined into a uniform mixture. But don’t overmix. You’re not trying to whip air into this. Just get the eggs incorporated.
Fill ‘Em Up and Bake
Grab a spoon or small ladle.
Carefully fill each crust. You’re aiming for about two-thirds full. That’s roughly 1½ tablespoons per cup.
This measurement matters.
Overfill them? Messy overflow in your oven. Underfill them? Less of that delicious gooey center.
The filling will look pretty liquidy right now. That’s totally normal. It sets up beautifully as it bakes. Don’t panic if it seems like there’s not much in there. It expands.
Slide that muffin tin into your preheated oven.
Set a timer for 18 minutes.
What you’re looking for:
- Crust edges turning golden brown
- Filling set around the edges
- Center still slightly jiggly
See that little jiggle in the middle?
That’s your friend.
That’s what gives you perfect gooey texture once everything cools down.
When your timer goes off, pull them out.
Here’s where people mess up:
They immediately try to remove the pies.
Don’t.
Let them sit in the pan for at least 10 minutes. The filling is still setting during this time. After 10 minutes, carefully move them to a wire rack.
Let them cool completely.
I know waiting is hard. But it’s worth it.
My Hard-Earned Tips and Tricks
Let me share what I’ve learned after making these probably 50+ times.
The Timing Thing
Pull them when the centers still jiggle a bit.
They’ll keep cooking from residual heat. This technique is the difference between a gooey center and an overcooked, dry filling. Every single time I’ve overbaked them “just to be safe,” I’ve regretted it.
If Your Crusts Keep Shrinking
Pop that filled muffin tin in the fridge for 10 minutes before baking.
This chills the butter in the dough. Helps it hold its shape way better. Game changer if you’ve been fighting the shrinking crust battle.
If They’re Sticking
Two things:
- Use plenty of nonstick spray
- Those parchment paper strips I mentioned earlier
Seriously, those little handles make everything so much easier. Just lift gently after cooling. They pop right out.
No scraping. No tears. No frustration.
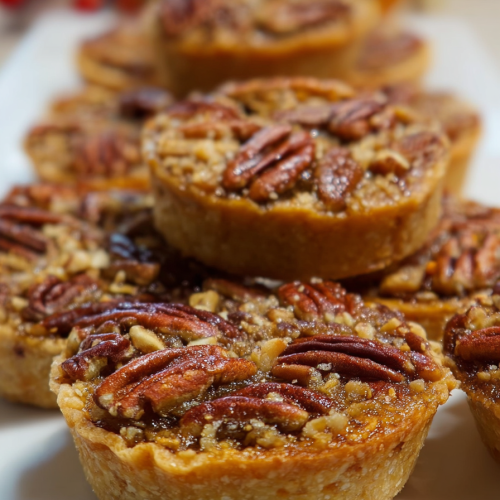
How to Serve These
Room temperature? Delicious.
Slightly warm? Even better.
Just zap them in the microwave for 10 seconds. Boom. Fresh-from-the-oven experience.
Want to get fancy?
- Top with freshly whipped cream
- Add a small scoop of vanilla ice cream
- Drizzle with caramel sauce
- Sprinkle with flaky sea salt
That salt thing? It cuts through the sweetness in the best way. Adds this gourmet touch that makes people think you went to pastry school.
They also pair beautifully with:
- Hot coffee
- Hot cider
- Pretty much any fall beverage
Storing These Bad Boys
Once they’re completely cool, grab an airtight container.
Room temperature: 2 days Refrigerator: 4 days
Honestly? I prefer them chilled. The filling gets even more fudgy and delicious.
Need to keep them longer?
These freeze like a dream.
Here’s how:
- Place cooled pies in a single layer
- Use a freezer-safe container
- Separate layers with parchment paper
- They’ll keep frozen for up to one month
When you’re ready to eat them, thaw overnight in the fridge.
Your Questions Answered
Can I use homemade pie crust instead?
Absolutely! If you’re a from-scratch person, go for it. Use your favorite recipe. Follow the same cutting and shaping instructions I gave you. The baking time stays the same.
I don’t have corn syrup. What can I use?
Maple syrup works as a substitute.
But here’s the thing: your filling will taste different. And it might be a bit thinner. The corn syrup creates that classic sticky-sweet pecan pie texture. So if you can get your hands on some, I’d stick with it.
Can I make tiny versions in a mini muffin pan?
Yep! Use a 2-inch cutter for mini muffin pans. Cut your baking time down to 12-14 minutes. Watch them carefully though. They bake way faster in those smaller pans.
Why is my filling still runny after baking?
The filling needs time to set properly.
Make sure you’re letting them cool completely in the pan before removing. Still runny after they’re totally cool? They probably needed an extra 2-3 minutes of bake time.
How do I stop the filling from leaking under the crust?
Press your crust firmly into each cup. Check for gaps or tears before filling. Only fill them two-thirds full. And inspect each crust carefully before adding any filling.
Any holes = automatic leakage.
Take your time with this step. It matters.
There you go! Everything you need to make these absolutely delicious mini pecan pies. They’re easier than you think. They taste incredible. And they’ll make you look like a baking genius at your next gathering.
Now get in that kitchen and make some magic happen.
Mini Pecan Pies (Muffin Tin Recipe)
Ingredients
- 1 package store-bought pie crust 2 crusts, refrigerated roll-out style
- 1¼ cups chopped pecans fresh pecans, roughly chopped
- ⅔ cup light corn syrup
- ⅓ cup light brown sugar packed
- 2 large eggs room temperature, lightly beaten
- 3 tablespoons melted butter unsalted preferred
- 1 teaspoon vanilla extract pure extract recommended
- ¼ teaspoon ground cinnamon optional
- ¼ teaspoon salt
- nonstick cooking spray for greasing muffin tin
Instructions
- Preheat oven to 350°F. Generously spray a 12-cup muffin tin with nonstick cooking spray, making sure to coat the bottom, sides, and top of the pan. Optional: Cut small strips of parchment paper and lay one across the bottom of each cup with ends sticking up for easy removal.
- Unroll the first pie crust onto a lightly floured surface. Roll gently to a 12-inch circle, about ⅛-inch thick. Using a 3-inch round cookie cutter or drinking glass, cut out 12 circles, positioning them close together to minimize waste.
- Gently press each circle into a muffin cup, molding it against the bottom and sides. The dough should come about halfway up each cup. Check for tears or holes. Repeat with the second crust. Gather scraps, reroll, and cut more circles for a total of 24 crusts.
- In a large mixing bowl, whisk together brown sugar, melted butter, and corn syrup until smooth and the sugar begins to dissolve with no butter streaks remaining.
- Add vanilla extract, cinnamon, and salt to the mixture. Whisk until glossy and well combined.
- Fold in the chopped pecans and stir until every piece is coated with the sweet mixture.
- Add the lightly beaten eggs and stir gently but thoroughly until everything is combined into a uniform mixture. Do not overmix.
- Carefully fill each crust about two-thirds full (approximately 1½ tablespoons per cup). The filling will look liquidy but will set during baking.
- Bake for 18-20 minutes until crust edges are golden brown, filling is set around the edges, and the center is still slightly jiggly. Do not overbake.
- Remove from oven and let sit in the pan for at least 10 minutes. The filling will continue to set during this time. After 10 minutes, carefully transfer to a wire rack to cool completely.