

There is something about the smell of fresh bread baking in the oven.
It wraps around you like a warm hug. It fills every corner of the house. And for a few minutes, everything just feels right.
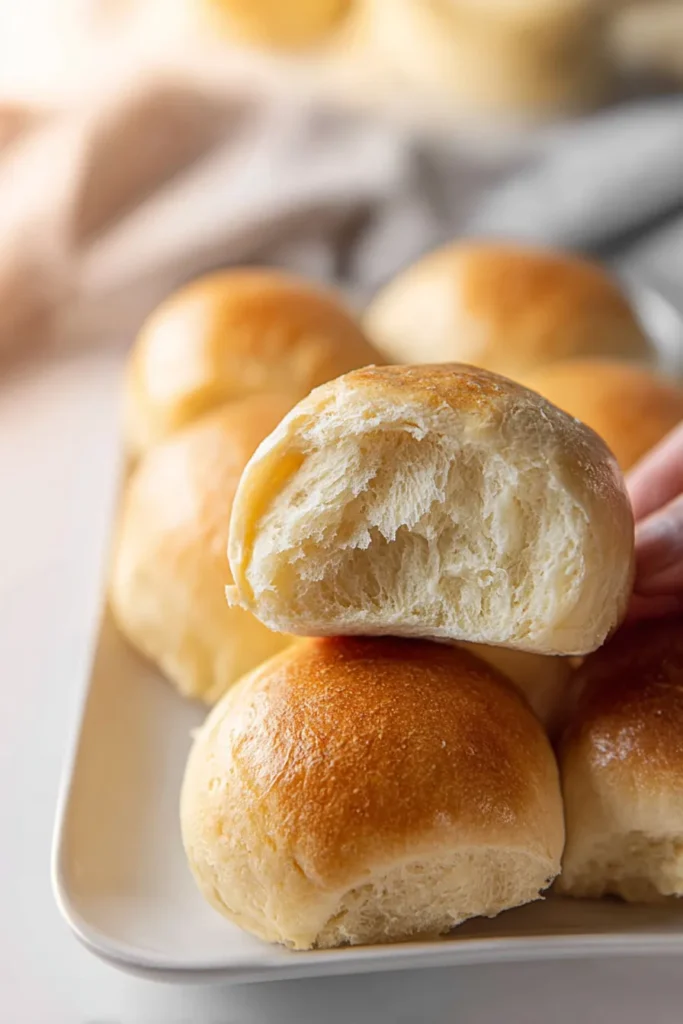
That is exactly what happens every time I make these Easy French Bread Dinner Rolls. A perfectly crispy, chewy outside. An impossibly soft, fluffy inside. And a process that is way simpler than you might think.
I know what you are probably thinking. “Yeast bread? At home? I will mess it up.” Trust me. I have been there. But after years of testing and tweaking this exact method, I can confidently say: you can absolutely do this.
Bread baking is part science, part art. You take a few simple pantry staples. You combine them in the right way. And somehow, something truly nourishing and delicious comes out of the oven.
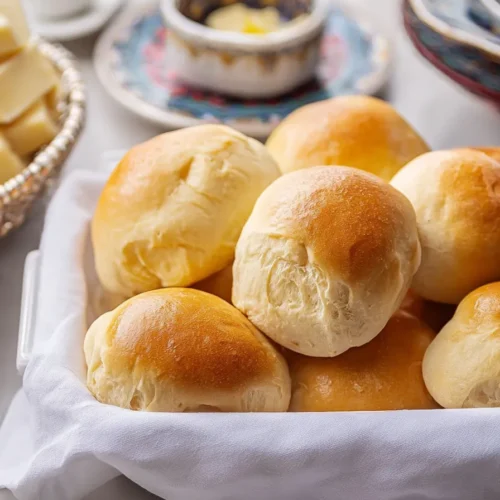
These rolls are the kind of thing that turns a regular Tuesday night dinner into something special. They look stunning on a holiday table too. And your family? They will genuinely think you picked these up from a fancy bakery downtown.
The best part is there are no complicated techniques here. No obscure tools. Just good ingredients, a little patience, and a lot of reward at the end.

Let’s Talk About the Ingredients First
Before we start mixing anything, let us take a moment to appreciate what goes into these rolls. Every single ingredient on this list is doing an important job.
All-purpose flour is the foundation. It gives the bread structure without making it heavy or dense. Warm water wakes the yeast up and gets it moving. Honey feeds the yeast so it can grow and create those beautiful air pockets. Olive oil adds richness and keeps the crumb moist and tender. Salt is non-negotiable. Without it, homemade bread tastes flat and almost cardboard-like.
And that optional sprinkle of cornmeal on the bottom of the pan? That is the little bakery-style detail that takes these rolls from homemade to wow.
Here is everything you will need:
| Ingredient | Quantity | Notes |
|---|---|---|
| All-purpose flour | 3 ½ cups (divided) | Spooned and leveled into the cup for accuracy |
| Warm water | 1 ¼ cups | Temperature must stay between 110-120°F |
| Honey | 2 tbsp | Acts as essential food for the yeast |
| Olive oil | 2 tbsp (plus extra) | Extra virgin olive oil works beautifully here |
| Instant yeast | 2 ¼ tsp | This equals one standard yeast packet |
| Salt | 2 tsp | Fine sea salt or standard table salt is perfect |
| Cornmeal | Optional | For lightly dusting the baking pan |
Quick Recipe Overview:
| Prep Time | Rise Time | Cook Time | Total Time | Servings | Difficulty |
|---|---|---|---|---|---|
| 15 minutes | 1 hour 15 minutes | 18 minutes | 1 hour 48 minutes | 16 rolls | Easy |
Step-by-Step Baking Instructions
Okay. Let us get our hands into the dough.
Step 1: Mix the Dough Base
Grab the large bowl of your stand mixer and attach the dough hook. Add exactly two cups of your all-purpose flour into the bowl. Pour in the warm water carefully. Then add the honey, olive oil, instant yeast, and salt.
Turn the mixer on to low speed. Let everything come together for just a few seconds.

Step 2: Add the Remaining Flour Gradually
Now slowly add the rest of your flour. Do this in one-quarter cup increments. Watch the dough come together little by little.
Once all the flour is added, keep the mixer running. Knead the dough on medium-low speed for about five minutes. You are looking for dough that:
- Pulls away cleanly from the sides of the bowl
- Feels smooth and slightly tacky
- Forms a nice, cohesive ball
Do not over-knead. This is important. Over-kneaded dough bakes up tough and dense. We want soft and elastic.
Not sure if your dough is ready? Try the windowpane test. Pinch off a small piece and stretch it gently between your fingers. If it forms a thin, see-through sheet without tearing, you are good to go. If it snaps, knead for one more minute and test again.
Step 3: First Rise (About 45 Minutes)
Find a clean, large glass bowl. Coat the inside lightly with olive oil. Drop your dough ball in and flip it over once. This coats the whole surface and keeps it from drying out.
Cover loosely with plastic wrap or a clean kitchen towel. Set it somewhere warm and draft-free. Let it proof for about 45 minutes until it has completely doubled in size.
While you wait, line a large baking sheet with parchment paper. If you are using cornmeal, sprinkle it lightly over the paper now. This creates a delicious rustic crunch on the bottom of each roll.
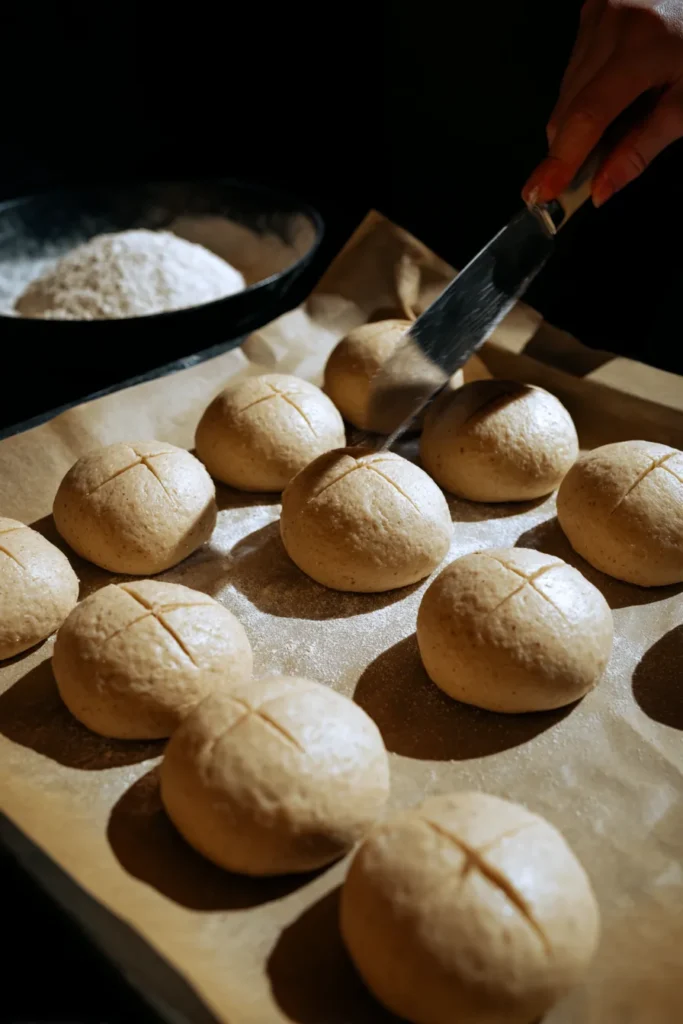
Step 4: Shape the Rolls
Once the dough has doubled, gently punch it down. This releases all the air bubbles that built up. Move the dough to a clean, lightly floured surface and shape it into a rough log.
Cut the log evenly into 16 pieces.
Now here is where you take your time. Shape each piece into a tight, smooth ball. Fold the edges underneath each piece to create tension on the surface. Then roll each ball firmly under your cupped palm on the counter. Place them on your prepared baking sheet with a little space between each one.
Step 5: Second Rise (30 to 45 Minutes)
Cover the pan with your kitchen towel again. Let the shaped rolls rise for another 30 to 45 minutes. They need to double in size one more time.
Right before they go into the oven, grab a sharp paring knife. Score a shallow line or small cross across the top of each roll. This lets steam escape while baking. It also gives them that classic bakery look.
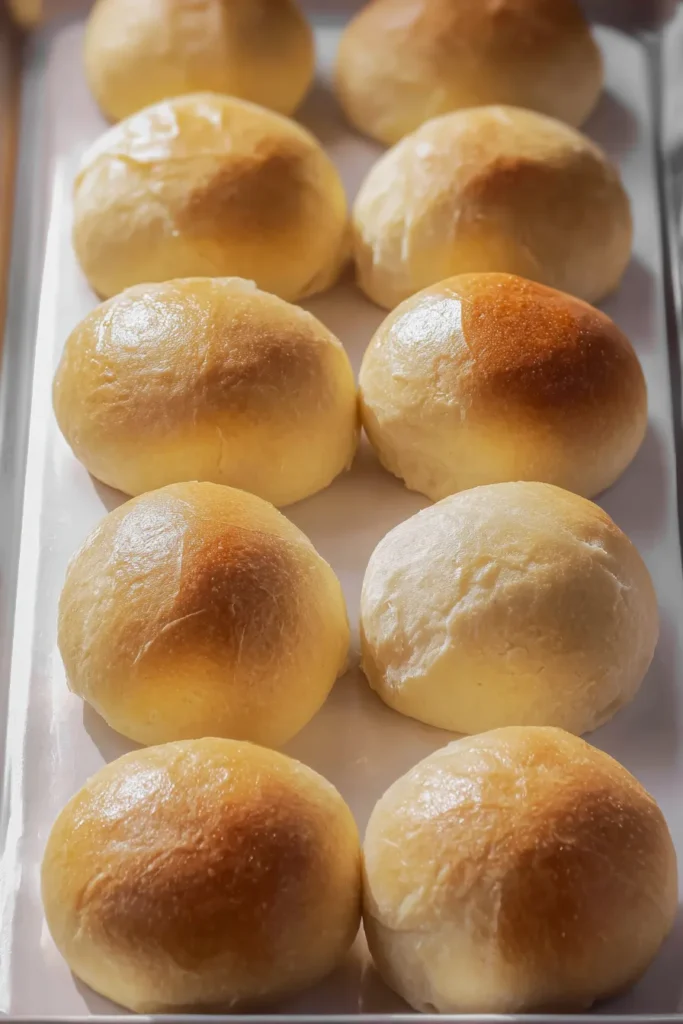
Step 6: Bake with Steam
Preheat your oven to 400 degrees Fahrenheit.
Here is my favorite trick for getting that perfect chewy crust. Place a shallow, oven-safe dish on the bottom rack of your oven. Pour about a cup of hot water into it right before you put the rolls in. That water creates steam inside the oven. The steam is what gives French bread its signature chewy, crackly exterior.
Bake the rolls on the middle rack for 16 to 18 minutes. You are looking for a deep, golden-brown color all over. Pull them out and let them cool slightly on a wire rack before serving.
Serving Ideas
You made it. Your kitchen smells unbelievable right now.
These rolls go with practically everything. Here are a few of my favorite ways to serve them:
- Tear them open while still warm and press in a generous pat of cold butter. Watch it melt. That is the moment.
- Serve them alongside a big bowl of roasted vegetable soup or tomato bisque for dipping.
- Pair them with a hearty plate of spaghetti. That chewy crust holds up beautifully against thick, rich sauces.
- Slice them open horizontally for adorable little slider sandwiches at your next gathering.
How to Store and Reheat
Fresh homemade bread does not have preservatives, so proper storage matters.
First, let the rolls cool completely on a wire rack. Storing warm bread creates condensation and ruins that beautiful crust you worked so hard for.
Once cool, place them in an airtight container and keep them at room temperature. They will stay fresh and tasty for up to three days.
To reheat, wrap the rolls loosely in aluminum foil and place them in a 350-degree oven for 5 to 10 minutes. They come out tasting like they just finished baking.
Frequently Asked Questions
Can I use active dry yeast instead of instant yeast?
Yes, absolutely. Just prepare it differently. Dissolve the active dry yeast in the warm water first. Let it sit for about 10 minutes until it gets frothy and bubbly. Once it blooms, continue with the rest of the recipe as written.
Why did my dough not rise?
Temperature is almost always the culprit. Water that is too hot kills the yeast instantly. A kitchen that is too cold slows everything down dramatically. Use a kitchen thermometer to verify your water is between 110 and 120 degrees. And find a cozy, warm corner for your dough to proof.
Can I freeze the dough?
You can, and it works really well. I recommend freezing the rolls right after shaping them. Place the raw dough balls on a lined baking sheet and freeze until solid. Then transfer them to a freezer bag. When you are ready to bake, just let them thaw and complete their second rise on the pan before baking.
Why did my rolls turn out dense?
Two things usually cause this. Too much flour or too much kneading. Always spoon your flour gently into the measuring cup instead of scooping. And stop kneading as soon as the dough feels smooth and elastic. More is not better here.
What if I skip the pan of water in the oven?
Your rolls will still taste delicious. But the crust will be softer and thinner. The steam is what gelatinizes the starches on the outer surface of the dough. That specific process is what creates the thick, chewy French bread crust. So if you love that texture, do not skip it.
Easy French Bread Dinner Rolls
Ingredients
- 3 1/2 cups all-purpose flour divided; spooned and leveled
- 1 1/4 cups warm water 110-120°F
- 2 tbsp honey acts as food for the yeast
- 2 tbsp olive oil plus extra for greasing
- 2 1/4 tsp instant yeast one standard packet
- 2 tsp salt fine sea salt or table salt
- cornmeal optional, for dusting the pan
Instructions
- In the bowl of a stand mixer fitted with a dough hook, combine 2 cups of flour, warm water, honey, olive oil, yeast, and salt. Mix on low speed briefly to combine.
- Slowly add the remaining flour in 1/4 cup increments. Knead on medium-low speed for about 5 minutes until the dough pulls away from the sides and feels smooth/tacky. Perform the windowpane test to ensure readiness.
- Place dough in a lightly oiled glass bowl, turning once to coat. Cover with a towel and let rise in a warm, draft-free spot for 45 minutes or until doubled in size.
- Punch down the dough and move to a floured surface. Shape into a log and cut into 16 even pieces. Roll each piece into a tight ball and place on a parchment-lined baking sheet (optionally dusted with cornmeal).
- Cover and let rise for 30 to 45 minutes until doubled. Preheat oven to 400°F. Before baking, score the top of each roll with a sharp knife.
- Place a shallow dish with 1 cup of hot water on the bottom rack of the oven to create steam. Bake rolls on the middle rack for 16-18 minutes until deep golden brown. Cool on a wire rack.