

Welcome to my kitchen.
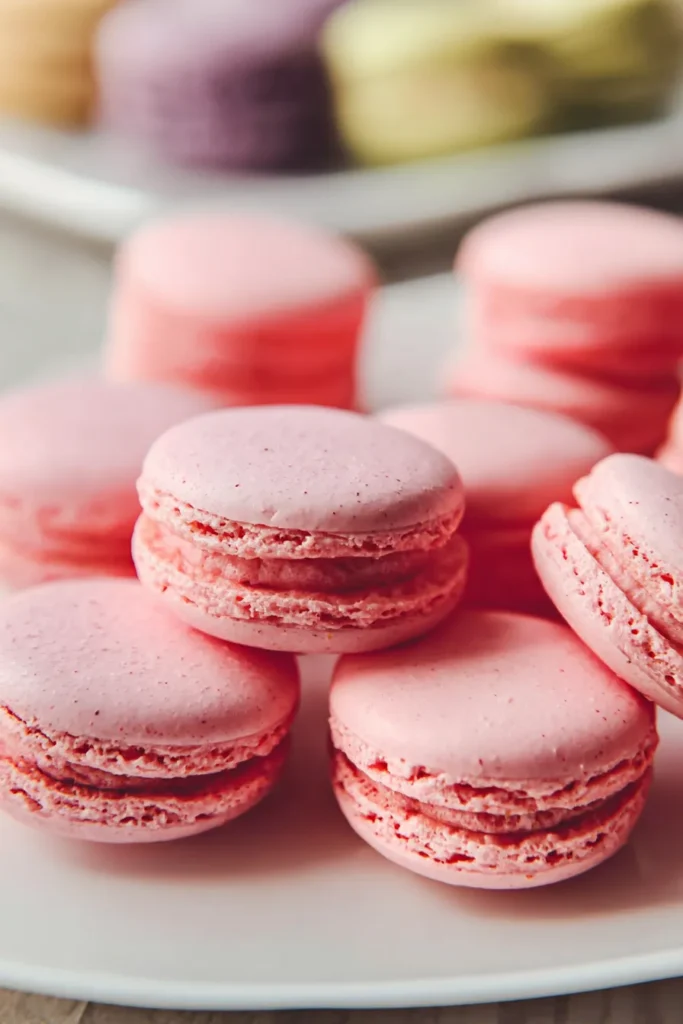
Today, we’re diving into one of the most iconic and honestly, most misunderstood treats in all of baking. French macarons. Those delicate little sandwich cookies with the smooth tops, ruffled feet, and creamy fillings that look almost too pretty to eat.
A lot of home bakers take one look at them and think, “Nope. Not for me.”
I get it. I really do. My first batch came out flat, cracked, and hollow all at once. It felt like the oven was personally attacking me.
But here’s the truth? Macarons aren’t magic. They’re just precise. Once you understand why each step matters, everything clicks into place. Patience and attention to detail are your two best tools in this kitchen.
Let’s get into it.
Prep Time: 45 minutes | Cook Time: 20 minutes | Total Time: 1 hour 5 minutes Servings: 24 | Difficulty: Medium
What You’ll Need
Before we touch a single ingredient, let’s talk about tools. Because with macarons, your equipment matters almost as much as your recipe.
Here’s what you’ll want ready:
- A digital kitchen scale this is non-negotiable. Eyeballing won’t work here.
- A fine-mesh sieve for sifting your dry ingredients
- A stand mixer (or hand mixer in a pinch)
- A flexible silicone spatula for folding
- A piping bag fitted with a round tip
- Two flat baking sheets lined with parchment paper
Got everything? Good. Now let’s look at the ingredients.
Ingredients
For the Macaron Shells
| Ingredient | Quantity | Notes |
|---|---|---|
| Blanched almond flour | 1½ cups (168g) | Must be blanched and finely ground |
| Powdered sugar | 1 cup (120g) | Sifted thoroughly to remove lumps |
| Egg whites | 3 large (100g) | Must be at room temperature |
| Cream of tartar | ¼ teaspoon | Crucial for stabilizing the meringue |
| Granulated sugar | ½ cup (100g) | Adds sweetness and structure |
| Vanilla extract | 1 teaspoon | Provides a beautiful warm flavor |
| Food coloring | 1 drop | Gel coloring is highly recommended; optional |
For the Butter Filling
| Ingredient | Quantity | Notes |
|---|---|---|
| Unsalted butter | 1 cup (226g) | Must be perfectly softened |
| Egg yolks | 5 large | Must be at room temperature |
| Water | 3 tablespoons | Used to thin the filling base |
| Salt | Pinch | Balances the rich butter flavor |
Step-by-Step Instructions

Step 1: Prep the Dry Ingredients
This first step is one that a lot of beginners want to skip.
Don’t.
Combine your blanched almond flour and powdered sugar. Pour them together into your fine-mesh sieve over a large bowl. Gently tap the side and let the fine powder fall through. You’ll notice some larger almond chunks left behind in the sieve. Throw those away. Don’t force them through.
Here’s why that matters. Forcing coarse bits through the mesh creates an oily batter. Oily batter leads to cracked shells. And cracked shells are heartbreaking after all that effort.
Sift the mixture a second time. Yes, really. That extra pass adds aeration and makes your final batter beautifully smooth.
Step 2: Build the Meringue
Think of the meringue as the beating heart of your macaron. If it’s not right, nothing else will be either.
Start with your room-temperature egg whites in a completely clean, grease-free bowl. Even a tiny bit of grease will stop your whites from whipping properly. It’s like trying to blow up a balloon with a hole in it.
- Begin whipping on medium-low speed until the mixture turns frothy
- Add the cream of tartar at this point
- Increase to medium speed
- Add granulated sugar one tablespoon at a time slowly, not all at once
- Keep whipping until you reach firm, stiff peaks
The finished meringue should look glossy and bright white. Almost like shaving cream, but shinier.
Add your vanilla extract and food coloring now. Mix gently until the color is even throughout.
Step 3: The Macaronage (This Is Where Most People Go Wrong)
Macaronage is just a fancy French word for the folding technique. But it’s the step that separates good macarons from great ones.
What you’re doing is deliberately knocking out some of the trapped air. Sounds counterintuitive, right? But too much air creates hollow shells. You want just enough left to give them structure.
Keep folding until the batter is thick, shiny, and flows like slow-moving lava off your spatula.

The figure-eight test: Lift your spatula above the bowl and let batter drizzle off. Try to draw a figure eight without the stream breaking. If it holds for about ten seconds, you’re ready. If the batter breaks apart too quickly, fold a few more times and test again.
Step 4: Pipe the Shells
Transfer your batter into your piping bag. Hold the bag straight up and down not at an angle about half an inch above the parchment. Pipe small, even circles roughly two inches apart.
To finish each circle cleanly, give your wrist a quick little flick. This stops that annoying little point from forming on top.
Once the tray is full, lift it and firmly tap it on the counter five or six times. This releases any air bubbles hiding inside. If you still see bubbles on the surface, pop them gently with a toothpick.
Step 5: Rest the Shells (Don’t Rush This)
Now comes the hardest part for most bakers. Waiting.
This skin is what creates the iconic ruffled foot you see on a perfect macaron. The expanding air during baking has nowhere to go up, so it pushes out sideways along the bottom. That’s your foot.
Depending on humidity, this resting phase takes about 45 minutes. On a humid day, it can take longer. Be patient.

Step 6: Bake the Shells
Preheat your oven to 300°F (150°C).
Place one tray at a time in the center rack. Bake for 15 to 18 minutes.
Do not I repeat, do not open the oven door in the first ten minutes. That rush of cool air can collapse the shells before they’ve set.
Once done, let them cool completely on the tray before touching them. Warm shells tear easily. Give them time.
Step 7: Make the Butter Filling
While your shells cool, let’s put together the filling.
Place your room-temperature egg yolks in a clean mixing bowl. Whip them until they turn pale and thick. Slowly drizzle in the three tablespoons of water, mixing as you go. Add your pinch of salt.
Then, one tablespoon at a time, add your softened unsalted butter. Keep the mixer running on medium speed throughout. The filling will slowly transform into something incredibly smooth and creamy rich enough to balance the delicate sweetness of the shells perfectly.
Step 8: Assemble the Macarons
Pair up your cooled shells by size find each shell its best match. Pipe a small mound of butter filling onto the flat side of one shell. Gently press its partner on top until the filling just reaches the edges.
That’s it. You made macarons.

Troubleshooting Common Problems
Even experienced bakers hit bumps with these. Here’s what’s likely going wrong and how to fix it.
| Problem | Most Likely Cause | Fix |
|---|---|---|
| No ruffled foot | Shells weren’t rested long enough | Always wait for a dry, matte skin before baking |
| Hollow centers | Meringue was overbeaten or underbaked | Whip on medium speed; bake fully |
| Cracked tops | Oven too hot, or oily almond flour | Use an oven thermometer; use quality blanched flour |
| Flat, misshapen shells | Batter was overmixed | Stop folding earlier; use the figure-eight test |
No ruffled foot? You likely rushed the resting phase. That dry skin is what pushes the expanding air sideways during baking. No skin, no foot.
Hollow shells? Your meringue was probably overbeaten. Whipping egg whites too fast creates an unstable structure that collapses in the oven. Keep it on medium speed.
Cracked tops? Your oven is running too hot. Always verify your temperature with an oven thermometer most home ovens lie to you.
Flat cookies? You overmixed the batter. All the trapped air got knocked out during macaronage. Next time, stop folding earlier and test more often.
Frequently Asked Questions
Can I use natural almond meal instead of blanched almond flour? No. Natural almond meal contains oils and coarse skins that will completely destabilize your meringue. Stick with finely ground, blanched almond flour.
Is cream of tartar really necessary? Yes. It adds acidity that stabilizes the egg whites and prevents the meringue from weeping or collapsing. Skip it and you’re taking a real risk.
Can I use liquid food coloring? It’s better not to. Liquid coloring adds extra moisture to a batter that’s already very sensitive. That extra liquid throws off the consistency. Gel coloring gives you vibrant color with none of the risk.
When can I eat them? Not right away as much as you’ll want to. Place your assembled macarons in an airtight container and refrigerate for 24 hours before eating. This is called the maturation phase. The filling slowly softens the shells, creating that perfectly chewy texture that makes a great macaron unforgettable.
How to Store Your Macarons
| Storage Method | How Long They Last | Notes |
|---|---|---|
| Refrigerator (airtight container) | Up to 7 days | Best option for texture |
| Freezer (airtight container) | Up to 1 month | Thaw overnight in fridge |
| Room temperature | 1 to 2 days | Only in a cool, dry environment |
Always bring them back to room temperature before serving. About 20 minutes out of the fridge is all they need. The butter filling softens up and the texture becomes exactly what it should be.
Baking perfect macarons on the first try is rare. Even I’ve had batches go sideways. But every failed tray teaches you something about your oven, your technique, your timing.
Keep going. Keep testing. Keep tasting.
The batch that finally comes out right? Completely worth it. Happy baking.

Foolproof French Macarons
Ingredients
For the Macaron Shells
- 1 1/2 cups blanched almond flour 168g, must be blanched and finely ground
- 1 cup powdered sugar 120g, sifted thoroughly to remove lumps
- 3 large egg whites 100g, must be at room temperature
- 1/4 tsp cream of tartar Crucial for stabilizing the meringue
- 1/2 cup granulated sugar 100g, adds sweetness and structure
- 1 tsp vanilla extract Provides a beautiful warm flavor
- 1 drop food coloring Gel coloring is highly recommended; optional
For the Butter Filling
- 1 cup unsalted butter 226g, must be perfectly softened
- 5 large egg yolks Must be at room temperature
- 3 tbsp water Used to thin the filling base
- 1 pinch salt Balances the rich butter flavor
Instructions
- Prep the Dry Ingredients: Combine the blanched almond flour and powdered sugar in a fine-mesh sieve over a large bowl. Gently tap the side to sift the mixture, and discard any larger almond chunks left behind. Sift the entire mixture a second time to ensure absolute smoothness and aeration.
- Build the Meringue: In a completely clean, grease-free bowl, whip the room-temperature egg whites on medium-low speed until frothy. Add the cream of tartar, increase the mixer to medium speed, and slowly add the granulated sugar one tablespoon at a time. Continue whipping until you achieve glossy, firm, stiff peaks. Gently fold in the vanilla extract and gel food coloring until uniform.
- The Macaronage: Fold your sifted dry ingredients into the meringue using a flexible silicone spatula, deliberately pressing out some of the trapped air. Keep folding until the batter is thick, shiny, and flows smoothly off your spatula like slow-moving lava. It is ready when it passes the figure-eight test without breaking.
- Pipe the Shells: Transfer the batter into a piping bag fitted with a round tip. Holding the bag completely vertical about half an inch above your parchment-lined baking sheets, pipe small, even circles roughly two inches apart. Finish each circle with a quick flick of the wrist to prevent points, then firmly tap the baking sheet on the counter 5 to 6 times to release trapped air bubbles. Pop any remaining bubbles with a toothpick.
- Rest the Shells: Let the piped trays sit undisturbed at room temperature for approximately 45 minutes. They are ready to bake when a dull, matte skin forms over the surface and the batter no longer sticks to your finger.
- Bake the Shells: Preheat your oven to 300°F (150°C). Bake one tray at a time on the center rack for 15 to 18 minutes. Do not open the oven door during the first 10 minutes of baking. Once baked, remove from the oven and allow the shells to cool completely on the tray before touching them.
- Make the Butter Filling: In a clean bowl, whip the room-temperature egg yolks until thick and pale. Slowly drizzle in the 3 tablespoons of water and a pinch of salt while continuing to mix. With the mixer running on medium speed, add the softened unsalted butter one tablespoon at a time until the filling transforms into a smooth, creamy, and rich spread.
- Assemble the Macarons: Match up your completely cooled macaron shells by size. Pipe a small mound of the butter filling onto the flat side of one shell, then gently press its matching partner on top until the filling perfectly reaches the edges. Place assembled macarons in an airtight container and refrigerate for 24 hours to mature before serving.
Notes
• Always verify your oven temperature with an independent oven thermometer to avoid hollow or cracked shells.
• Avoid using liquid food coloring or natural almond meal, as the excess moisture and oils will destabilize the sensitive meringue batter.
• Storage: Store in an airtight container in the refrigerator for up to 7 days, or freeze for up to 1 month. Always bring back to room temperature for 20 minutes before serving so the filling can soften perfectly.