

Let me tell you something: there are mornings when I wake up craving fresh bread but absolutely refuse to spend hours kneading dough. You know those days? When you want that bakery smell filling your kitchen but you’ve also got about seventeen other things on your to-do list?
This quick German bread recipe changed everything for me. Just 5 minutes of active prep time, and suddenly I’m pulling a gorgeous, crusty loaf from my oven. No fancy equipment. No complicated techniques. Just honest, delicious bread that tastes like you spent all day on it.
I stumbled onto this recipe during one of those frantic weeknight moments. My kids wanted “real bread” for their sandwiches, not the store-bought stuff. I had exactly thirty minutes before soccer practice. And honestly? I wasn’t even sure it would work.
But here’s the magic: this bread delivers. That crackling crust? Check. The soft, pillowy interior that practically begs for butter? Absolutely. The kind of flavor that makes you close your eyes on the first bite? You bet.
Why This German Bread Works Every Single Time
German breads have this incredible reputation for being hearty and substantial. They’re not fluffy white sandwich loaves. They’ve got character. They’ve got soul.
This quick version stays true to those traditions while being completely doable on a busy Tuesday. Think of it as your shortcut to old-world baking without the old-world time commitment.
The secret? A higher hydration dough that practically does the work for itself. No endless kneading sessions. No special equipment. Just mix, shape, and bake. The high heat creates steam that gives you that incredible crust without any fussy techniques.
I’ve made this bread at least fifty times now. Sometimes for breakfast toast. Sometimes for dinner alongside soup. Once, I made three loaves because my neighbor smelled it baking and basically invited herself over.
And you know what? Every single time, it turns out beautifully. Even when I’m distracted. Even when I’m rushing. Even when my measuring is more “eyeball it” than precise.
What You’ll Love About This Recipe
First off, it’s fast. Like, genuinely fast. Five minutes of hands-on time fast.
Second, it’s forgiving. Bread-making can feel intimidating, but this recipe doesn’t punish small mistakes. A little extra flour? No problem. Water slightly cooler than ideal? Still works.
Third, and maybe most importantly, it tastes incredible. That combination of crispy exterior and tender interior? That subtle sweetness from just a touch of sugar? That’s the stuff bread dreams are made of.
Whether you’re making toast for breakfast, sandwiches for lunch, or serving it alongside dinner with a pat of butter melting into every slice, this bread fits perfectly into your life.
Recipe Details & Instructions
Ingredients You’ll Need
Here’s everything for one perfect loaf. Nothing complicated or hard to find.
| Ingredient | Quantity | Notes |
|---|---|---|
| Water | 350 ml | Room temperature, not cold |
| Sugar | 1 tablespoon | Feeds the yeast, adds subtle sweetness |
| Dry yeast | 8 grams | About 2¼ teaspoons if measuring by volume |
| Sunflower oil | 25 ml | About 1½ tablespoons, keeps bread tender |
| Flour | 500 grams | Plus extra for dusting the work surface |
Recipe Timing:
Prep Time: 10 minutes | Cook Time: 15 minutes | Total Time: 25 minutes
Servings: 1 loaf (8-10 slices) | Difficulty: Easy

Step-by-Step Instructions
Step 1: Wake Up Your Yeast
Start by pouring that room temperature water into a large mixing bowl. Sprinkle in your sugar and yeast. Give it a gentle stir with a spoon.
Now here’s the important part: let it sit for about 5 minutes. You’ll see it get foamy and bubbly. That’s how you know your yeast is alive and ready to work its magic.
If nothing happens after 10 minutes? Your yeast might be expired. Toss it and grab a fresh packet.
Step 2: Build Your Dough
Once your yeast mixture is nice and foamy, drizzle in that sunflower oil. Give it another quick stir.
Now add your flour all at once. Using a wooden spoon or your hands, mix everything together until it forms a shaggy dough. It’ll look rough and uneven at first. That’s completely normal.
Keep mixing until there aren’t any dry flour patches left. The dough should pull away from the bowl sides but still feel slightly sticky.
Step 3: Knead Just a Little
Dust your counter or work surface with some extra flour. Turn your dough out onto it.
Here’s where this recipe gets easy: you only need to knead for about 2-3 minutes. Seriously, that’s it. Just fold the dough over itself, press it down, turn it a quarter turn, and repeat.
You’re looking for the dough to become smoother and more elastic. It should still be slightly tacky but not sticking to your hands like crazy.
Step 4: Shape Your Loaf
Once you’ve kneaded briefly, shape your dough into a round or oval loaf. Whatever shape feels natural to you works perfectly.
The key is to create some surface tension by tucking the edges underneath as you shape. This helps the bread hold its form during baking.
Place your shaped loaf onto a baking sheet lined with parchment paper. Or if you have a bread pan, you can use that instead.
Step 5: Quick Rest (Optional but Helpful)
If you’ve got 10-15 extra minutes, cover your shaped loaf with a clean kitchen towel. Let it rest while your oven preheats.
This brief rest lets the gluten relax and the dough puff up just slightly. But honestly? If you’re in a rush, you can skip this and go straight to baking.
Step 6: Bake to Golden Perfection
Preheat your oven to 425°F (220°C). If you want extra steam for a crustier exterior, place a small pan of water on the bottom oven rack.
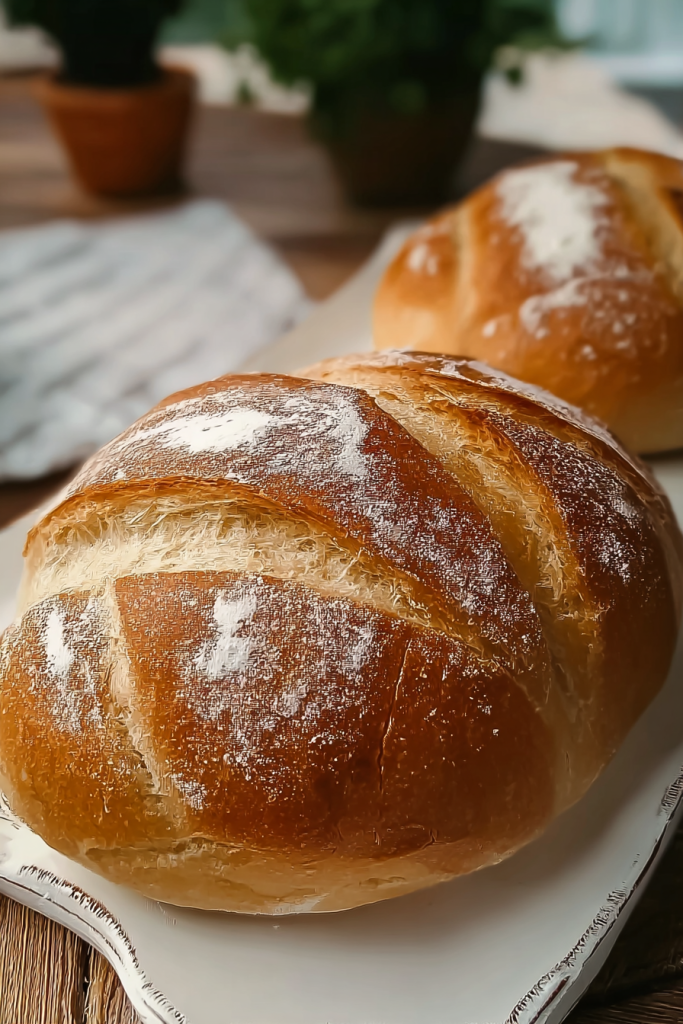
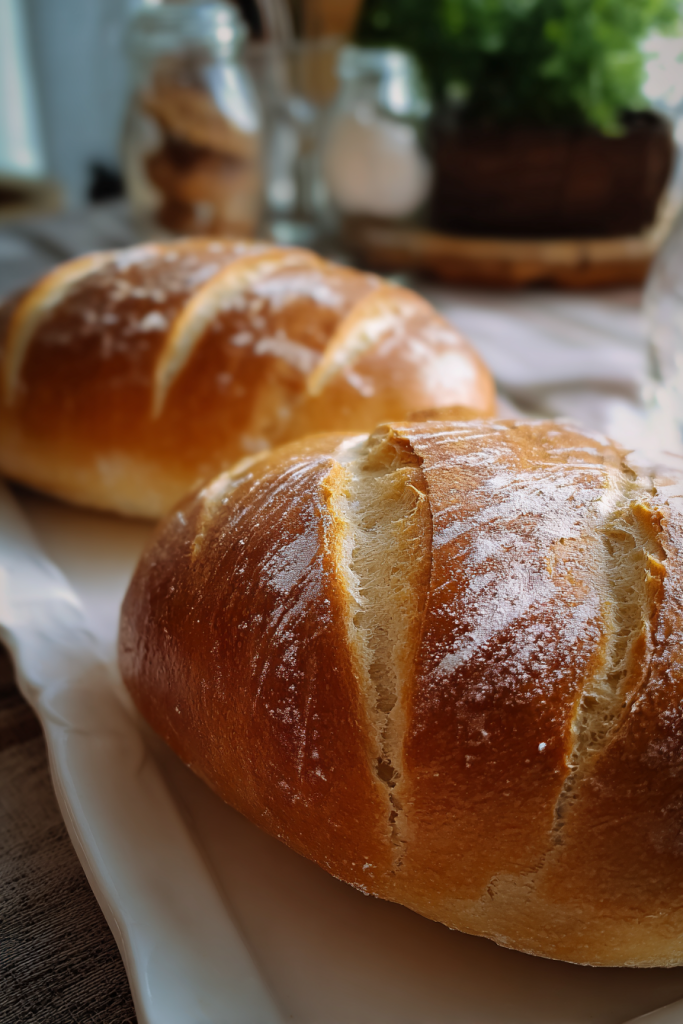
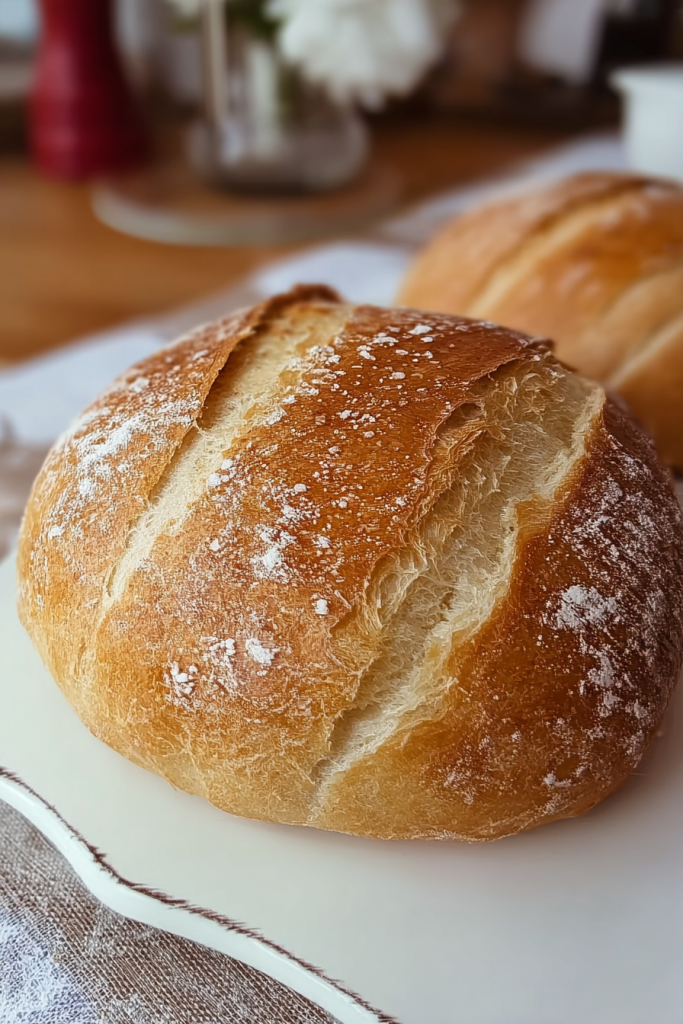
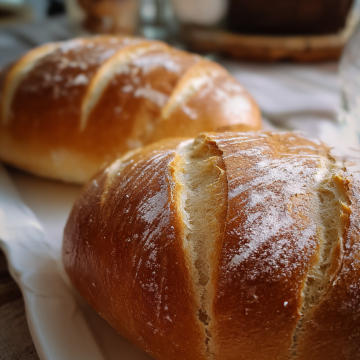
Using a sharp knife, slash the top of your loaf with 2-3 diagonal cuts. These cuts aren’t just decorative—they let steam escape and help the bread expand properly.
Slide your loaf into the hot oven. Bake for 25-30 minutes until the crust turns deep golden brown.
You’ll know it’s done when tapping the bottom of the loaf produces a hollow sound. Like knocking on a door that echoes.
Step 7: Cool and Enjoy
This is the hardest part: letting it cool for at least 10 minutes before slicing. I know the temptation is real. But cutting into hot bread can make the interior gummy.
Once cooled slightly, slice into that beauty and watch the steam rise. Slather on some butter while it’s still warm. Take that first bite and feel ridiculously proud of yourself.
Pro Tips for Success
Temperature matters: Room temperature water activates yeast perfectly. Too hot kills it. Too cold slows everything down.
Don’t skip the oil: That sunflower oil keeps your bread tender and adds a subtle richness.
Flour variations: If your dough feels too sticky, add flour one tablespoon at a time. Too dry? Add water the same way.
Crust preferences: For a softer crust, brush the hot loaf with melted butter right when it comes out of the oven.
Serving, Storage & FAQs
How to Serve This Beautiful Bread
Fresh from the oven, this bread shines with just butter and a sprinkle of flaky salt. Simple perfection.
But it also makes incredible sandwiches. Stack it with turkey, cheese, lettuce, and tomatoes. Or go classic with peanut butter and jam. The sturdy texture holds up to anything you throw at it.
I love serving thick slices alongside soup or stew. It’s perfect for dunking and soaking up every last drop.
Toasted the next day? Even better. The crust gets extra crispy while the inside stays tender.
Storage Tips
Store your cooled bread in a bread box or wrapped in a clean kitchen towel. It’ll stay fresh for 2-3 days at room temperature.
For longer storage, slice the loaf and freeze individual portions. Pull out slices as needed and toast them straight from frozen.
Avoid storing bread in the refrigerator. It actually makes bread go stale faster. Room temperature or freezer are your best options.
Frequently Asked Questions
Can I use instant yeast instead of dry yeast?
Yes, absolutely. Use the same amount. Instant yeast can go straight into the flour without proofing first if you prefer.
Why didn’t my bread rise much?
Check your yeast’s expiration date. Old yeast loses its power. Also, make sure your water isn’t too hot—anything over 110°F can kill the yeast.
Can I add seeds or herbs?
Definitely! Fold in sunflower seeds, pumpkin seeds, or dried herbs during the kneading step. About ½ cup of add-ins works perfectly.
What if I don’t have sunflower oil?
Substitute with olive oil, vegetable oil, or even melted butter. Each adds its own subtle flavor.
How do I get a crunchier crust?
Place a pan of water in the bottom of your oven while baking. The steam creates a crispier, more professional-looking crust.
Final Thoughts
This quick German bread proves that homemade bread doesn’t need to be complicated. Just simple ingredients, minimal effort, and maximum flavor.
Once you make this recipe, store-bought bread loses its appeal. There’s something special about pulling your own loaf from the oven. About cutting into that golden crust. About sharing warm slices with the people you love.
So grab your ingredients and give it a try. Your kitchen will smell amazing. Your family will be impressed. And you’ll wonder why you ever thought bread-making was hard.
Quick German Bread Recipe (5-Minute Prep)
Ingredients
- 350 ml water room temperature
- 1 tablespoon sugar
- 8 grams dry yeast about 2¼ teaspoons
- 25 ml sunflower oil about 1½ tablespoons
- 500 grams all-purpose flour plus extra for dusting
Instructions
- Activate the yeast: Pour room temperature water into a large mixing bowl. Add sugar and yeast, stir gently. Let sit for 5 minutes until foamy and bubbly.
- Mix the dough: Add sunflower oil to the yeast mixture and stir. Add all the flour at once. Mix with a wooden spoon or hands until a shaggy dough forms with no dry patches.
- Knead briefly: Dust work surface with flour. Turn dough out and knead for 2-3 minutes until smooth and elastic. Dough should be slightly tacky but not sticky.
- Shape the loaf: Shape dough into a round or oval loaf, tucking edges underneath to create surface tension. Place on a parchment-lined baking sheet.
- Rest (optional): Cover with a clean kitchen towel and let rest for 10-15 minutes while oven preheats. Can skip if in a rush.
- Preheat oven: Heat oven to 425°F (220°C). For a crustier loaf, place a small pan of water on the bottom oven rack.
- Score and bake: Using a sharp knife, make 2-3 diagonal slashes across the top of the loaf. Bake for 25-30 minutes until deep golden brown and the bottom sounds hollow when tapped.
- Cool: Let bread cool for at least 10 minutes before slicing to prevent a gummy interior.
Notes
Yeast Check: If yeast doesn’t foam after 10 minutes, it may be expired. Use fresh yeast for best results.
Dough Consistency: If dough is too sticky, add flour 1 tablespoon at a time. If too dry, add water the same way.
Oil Substitutes: Can use olive oil, vegetable oil, or melted butter instead of sunflower oil.
Add-Ins: Fold in ½ cup of sunflower seeds, pumpkin seeds, or dried herbs during kneading for variation.
Softer Crust: Brush the hot loaf with melted butter immediately after baking for a softer crust.
Storage: Store at room temperature in a bread box or wrapped in a kitchen towel for 2-3 days. Freeze sliced portions for longer storage. Avoid refrigerating as it makes bread stale faster.
Instant Yeast: Can substitute with instant yeast using the same amount. Instant yeast can be mixed directly into flour without proofing.Claude can make mistakes. Please double-check responses.
4 Comments
I don’t see salt added. First time I’ve seen recipe for bread without it. Is this correct?
Great catch, Theresa – you’re absolutely right 👍
Traditional bread does include salt. This recipe works without it for speed and simplicity, but you can (and should, if you prefer fuller flavor) add 1–1½ teaspoons of salt to the flour. It won’t affect the rise and will enhance the taste beautifully. Thanks for pointing it out!
Could this recipe be baked in one of those German clay pots with the top on?
Could this recipe be baked in one of those German clay pots with the top on? I don’t remember what it is called, but I use it often for chicken, etc.