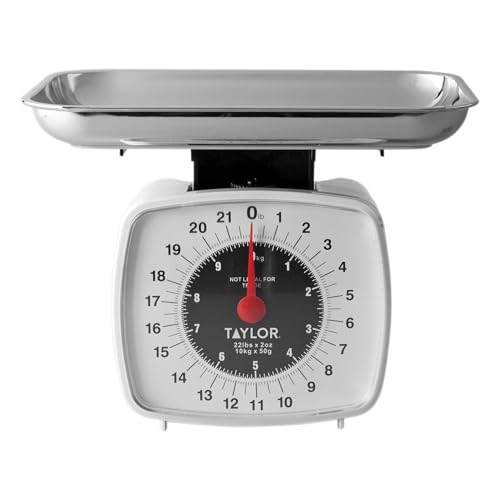
Portion Scale Explained: A Complete Guide
Hundreds of kitchen products are designed to last over the years. The ones that endure are never the flashiest — they are always the simplest, heaviest, and most boring-looking tools in the entire drawer. A good portion scale fits that description perfectly. It does not chop, blend, or spin. It simply tells you how much something weighs, and that one task can save you from a dozen failed recipes and a sink full of measuring cups.
The trick is knowing which features actually matter and which ones are just marketing fluff. I have owned scales that cost under twenty dollars and ones that cost over a hundred. The expensive ones did not make my bread rise any better. The cheap ones did not fall apart if I treated them with basic care. What separates a useful portion scale from a frustrating one has nothing to do with price and everything to do with design, durability, and how you actually use it.
Key Takeaways
- A portion scale replaces multiple measuring cups and spoons, saving drawer space and cleanup time.
- Accuracy to 1 gram is sufficient for home cooking; 0.1 gram precision is only needed for very small quantities like salt or yeast.
- Look for a scale with a tare function, a readable display, and a flat surface that does not wobble.
What a Portion Scale Actually Does
A portion scale is simply a weighing device designed for food. It measures mass in grams, ounces, pounds, or kilograms. The term “portion” refers to its common use in dividing bulk ingredients into equal servings, though the same scale works for measuring flour, butter, meat, vegetables, and liquids.
The core functions are straightforward: place an item on the platform, read the weight, and optionally press tare to zero out the container weight before adding ingredients. That is it. No buttons for 57 different units of measurement. No Bluetooth connectivity to an app you will never open. A portion scale that works well does exactly three things: it turns on quickly, reads accurately, and stays still on the counter.
Why Weight Beats Volume Every Time
Measuring by volume — cups and tablespoons — introduces massive inconsistency. A cup of all-purpose flour can weigh anywhere from 120 grams to 150 grams depending on how it is scooped, sifted, or packed. That 20% swing can turn a tender cake into a dry brick or a chewy cookie into a flat disc. A portion scale eliminates that guesswork. When a recipe calls for 250 grams of flour, you get exactly 250 grams, regardless of humidity, scooping technique, or the phase of the moon.
This is not a new concept. Professional kitchens have weighed ingredients for decades. Home bakers are catching on because the results speak for themselves. If you have ever wondered why your bread does not look like the photos in the cookbook, the culprit is almost certainly inconsistent measuring.
How to Choose a Portion Scale That Earns Its Place
Every gadget in my drawer must prove it saves time across multiple tasks. A portion scale earns its spot if it meets three criteria: it must be accurate enough for both baking and everyday cooking, it must be easy to clean, and it must not take up more space than a small cutting board.
Capacity and Precision
Most home cooking requires a scale that can handle at least 5 kilograms (11 pounds) for larger batches of dough or whole roasts. Precision matters more for small quantities. A scale that reads in 1-gram increments is fine for flour, sugar, and most dry goods. If you frequently measure yeast, salt, or spices in amounts under 5 grams, look for a scale that reads in 0.1-gram increments. The difference between 2 grams of salt and 3 grams of salt in a small batch of cookies is noticeable.
Display and Readability
The display is where most budget scales fail. A small, dim LCD screen that you have to squint at is a daily annoyance. Look for a scale with large, high-contrast digits that you can read from a standing position. Backlit displays help in low light, but avoid scales with bright blue or red LEDs that wash out in sunlight. White or amber backlighting on a dark background works best.
Button placement matters too. The tare button should be large enough to press with a flour-covered finger. Tiny membrane buttons that require a fingernail to activate are a pain when your hands are sticky or wet.
Surface and Stability
A scale that wobbles on the counter is useless. The base should have four rubber feet that grip the surface, not two thin strips of foam that peel off after a month. The weighing platform should be flat and large enough to hold a standard mixing bowl — at least 20 centimeters (8 inches) across. Stainless steel platforms are easy to wipe clean. Glass platforms look nice but break if you drop a heavy bowl on them.
Using a Portion Scale for Different Cooking Tasks
A portion scale is not just for baking. I use mine for portioning ground meat into burger patties, dividing dough into equal rolls, measuring pasta for exactly two servings, and even weighing coffee grounds for a consistent brew. The more you use it, the more uses you find.
Baking with Precision
Baking is where a scale truly shines. For bread, weigh your flour, water, salt, and yeast directly into the mixing bowl. Press tare between each ingredient. No extra bowls to wash. No measuring cups to scrape. If you are following a sourdough recipe, the hydration ratio — the weight of water divided by the weight of flour — determines the final texture. A scale makes that calculation trivial. For guidance on baking bread at home, our baking bread on pizza stone guide covers temperature and timing details that pair well with precise ingredient weights.
Cookie dough benefits from portion control too. Weigh each ball of dough to the same gram weight, and every cookie bakes evenly. No more burnt edges on small cookies and raw centers on big ones. A scale turns inconsistent batches into repeatable results.
Meal Prep and Portion Control
For anyone tracking calories or macronutrients, a portion scale is the single most useful tool in the kitchen. A “serving” of chicken breast listed on a package is rarely the same as what you actually eat. Weighing raw meat gives you an accurate calorie count. Cooked weight changes because water evaporates, but raw weight is the standard reference.
Divide a large batch of chili or stew into equal portions by placing a container on the scale, taring it, and scooping until you hit the target weight. Repeat for each container. The entire process takes less than two minutes and gives you perfectly consistent meals for the week.
Dividing Dough and Batters
If you bake multiple loaves of bread or batches of bagels, dividing dough by weight ensures each piece is the same size. This matters for even proofing and baking. A 50-gram difference between two loaves can mean one is underbaked while the other is overbaked. Weigh each piece as you shape it, and adjust by pinching off or adding small bits of dough.
For batters like pancakes or waffles, weigh the total batter and divide by the number of servings. Scoop by weight rather than volume, and every pancake will be the same thickness and cook at the same rate.
Common Mistakes When Using a Portion Scale
Even a good scale gives bad results if you use it wrong. Here are the most frequent errors I see in home kitchens.
Not Taring Between Ingredients
The tare button resets the scale to zero with the container on top. If you add flour, then press tare, then add sugar, the scale reads only the sugar weight. This works perfectly as long as you remember to tare after each addition. Forgetting to tare means you end up guessing how much of each ingredient you actually added.
Using the Wrong Units
Many scales default to pounds and ounces. If your recipe uses grams, switch the unit before you start. Measuring flour in ounces works, but the numbers are less precise because ounces are larger units. A gram is roughly 0.035 ounces, so a 1-ounce increment skips over 28 grams of flour — enough to ruin a delicate cake.
Ignoring the Scale’s Warm-Up Time
Some digital scales take a few seconds to stabilize after you turn them on. If you place ingredients on the scale immediately, the reading may drift. Wait for the display to show zero before adding anything. This takes three seconds but prevents inaccurate measurements.
Maintaining Your Portion Scale for Long Life
A portion scale that costs twenty dollars can last for years with basic care. The most common failure point is not the electronics but the battery terminals corroding from moisture. Keep the scale away from direct steam and splashes. Wipe it down with a damp cloth, never submerge it in water. If the scale runs on AAA batteries, remove them if you do not use the scale for more than a month. Battery leakage destroys the contacts.
Calibration is rarely necessary for home use, but if you suspect the scale is drifting, check it with a known weight. A nickel coin weighs exactly 5 grams. Place one on the scale. If it reads between 4.9 and 5.1 grams, the scale is accurate enough. If it is off by more than that, look for a calibration mode in the manual or consider replacing the scale.
Frequently Asked Questions
Can I use a portion scale for liquids?
Yes. Water weighs 1 gram per milliliter at room temperature, so weighing water is equivalent to measuring its volume. For milk, oil, and other liquids, the density is close enough to water that weight-based measuring works for most recipes. Weighing is actually more accurate than using a liquid measuring cup because you avoid the meniscus reading error.
What is the difference between a portion scale and a kitchen scale?
The terms are interchangeable. “Portion scale” emphasizes the function of dividing bulk food into equal servings, while “kitchen scale” is a broader term for any scale used in cooking. Both measure the same thing. The features to look for — capacity, precision, readability — are identical regardless of the name on the box.
How do I clean a portion scale without damaging it?
Unplug the scale or remove the batteries first. Wipe the platform and body with a damp cloth and mild soap. Do not use abrasive scrubbers or spray water directly onto the scale. For sticky residue, use a small amount of rubbing alcohol on a cloth. Dry the scale immediately with a towel. Never put the scale in the dishwasher or submerge it in water.